
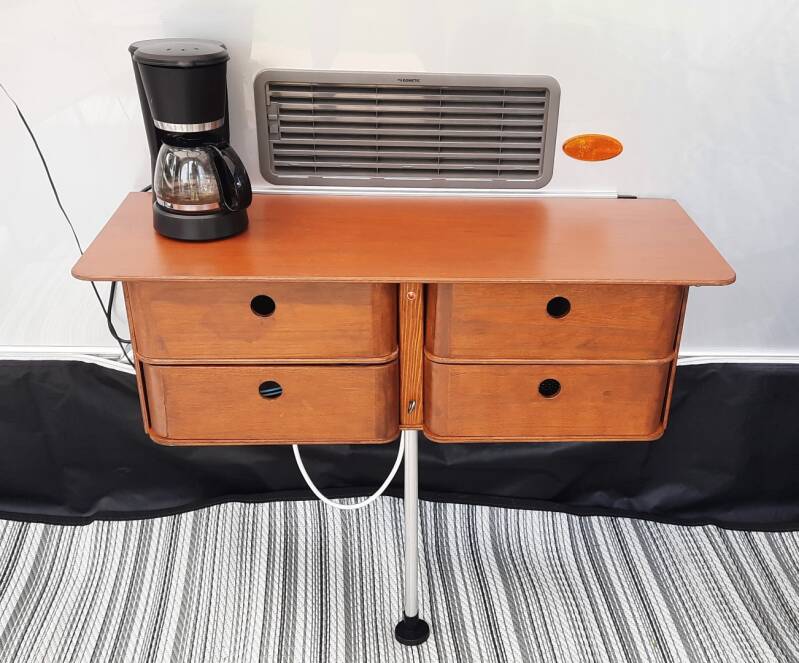
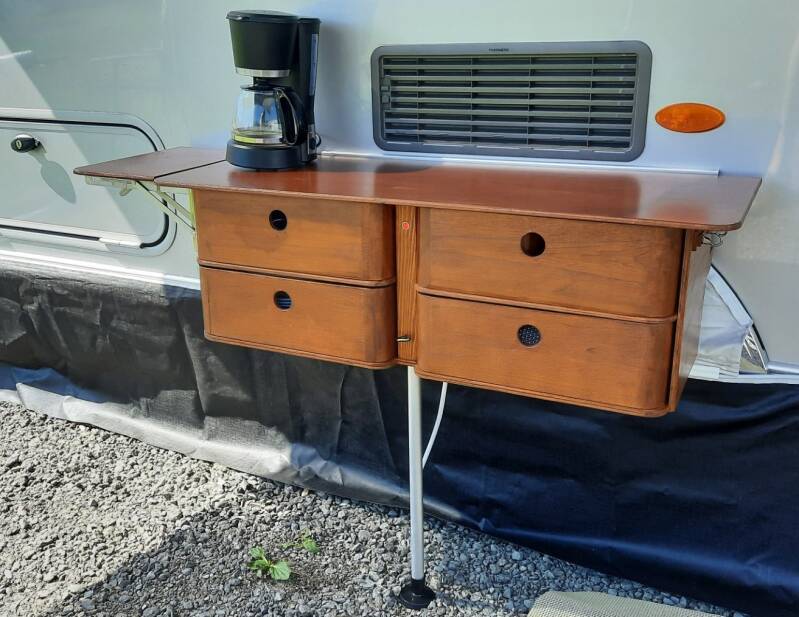
The Eriba has a strip at the front that allows you to use the small indoor table outdoors. (Photo left.)
But of course, we could also hang a cabinet with drawers there. The starting point consists of four lightweight wooden boxes measuring 36 x 26 x 12 cm: these will become the drawers. (Photo right.)
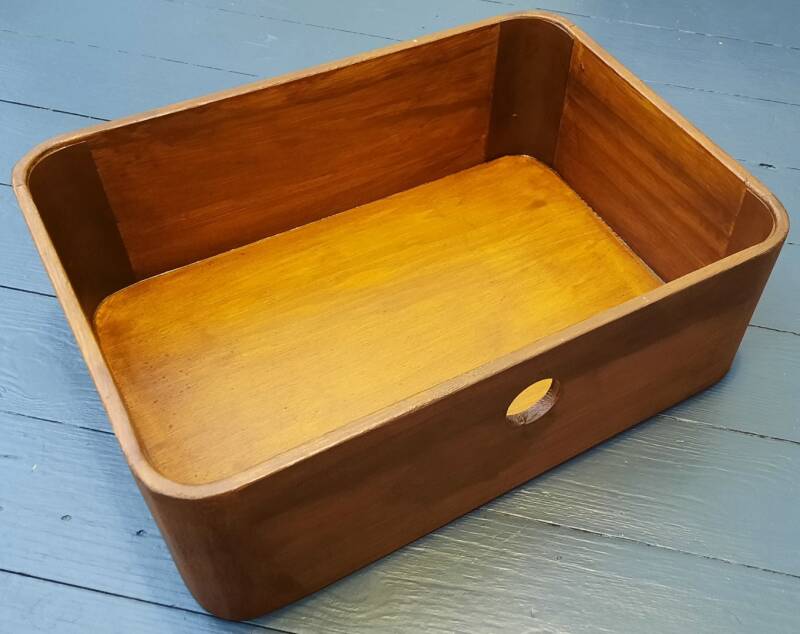
These boxes are lightweight, but the rounded corners are weak. So we glue brown cardboard into the corners with wood glue before painting them. We made a hole in the front (instead of a knob) and put some cabinet protector on the bottom.
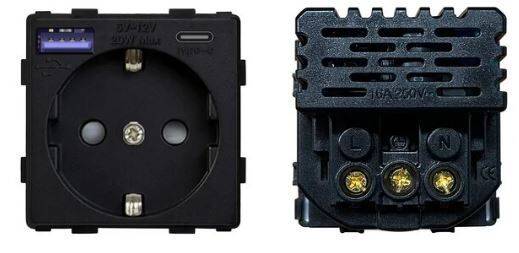
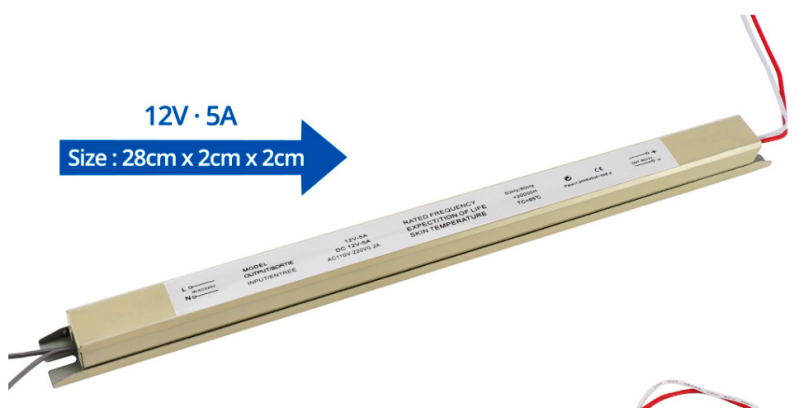
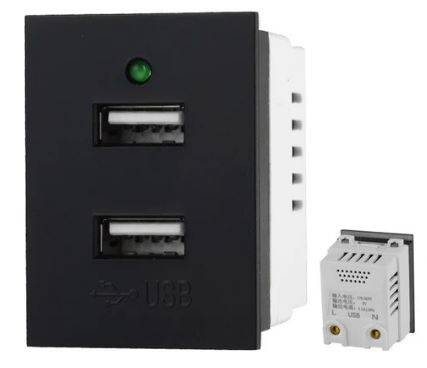
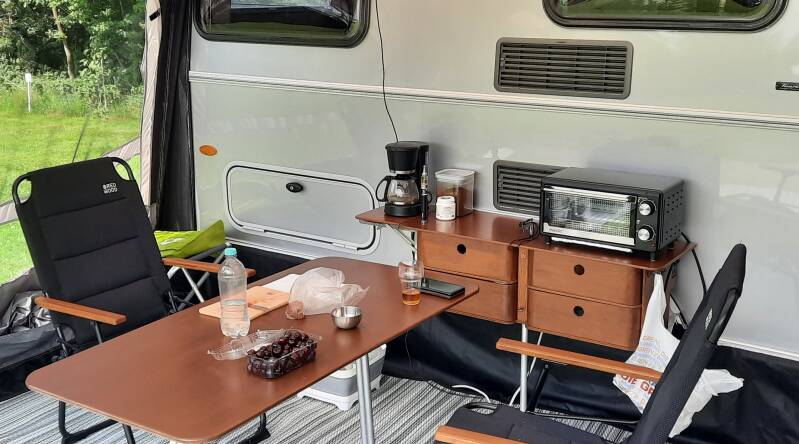
The cupboard will also house some electrical outlets. From left to right: 230V sockets with USB, a 12V DC power supply, and more USB connections.
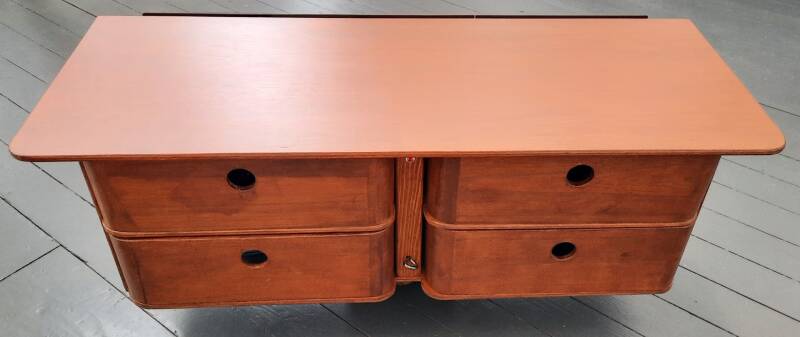
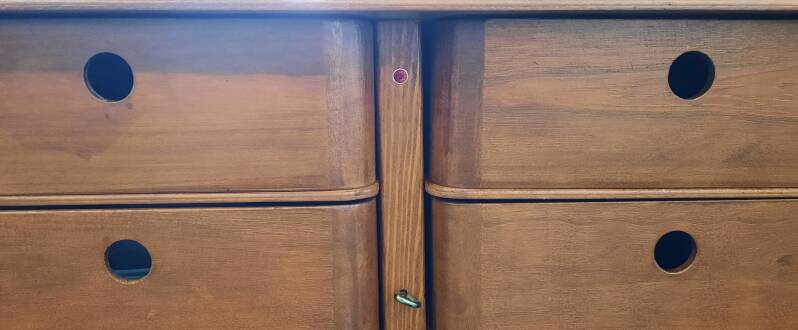
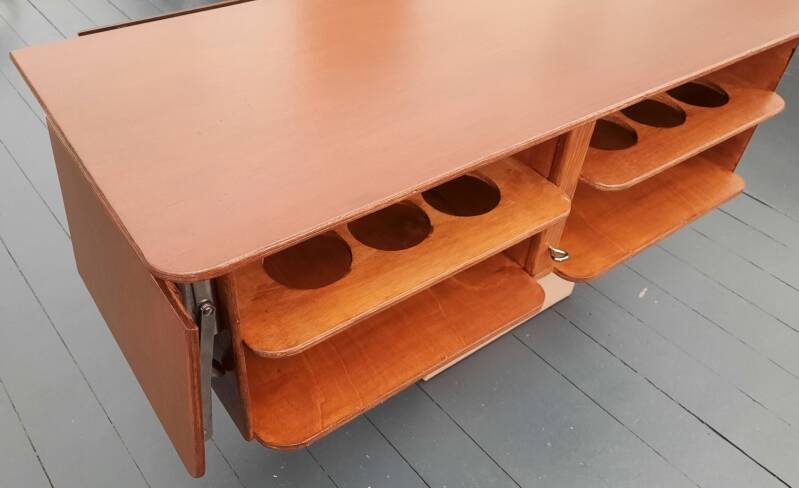
Front view of the chest of drawers with the mounting strip at the back. Why is there a small center divider between the drawers? Firstly, that's where the height-adjustable leg is located at the front. The adjusting screw for this leg can be seen at the bottom center.
Furthermore, there's room in the center inside for the long, narrow 12V=5A power supply (see photo above). Due to its length, this power supply is installed at an angle between the drawers.
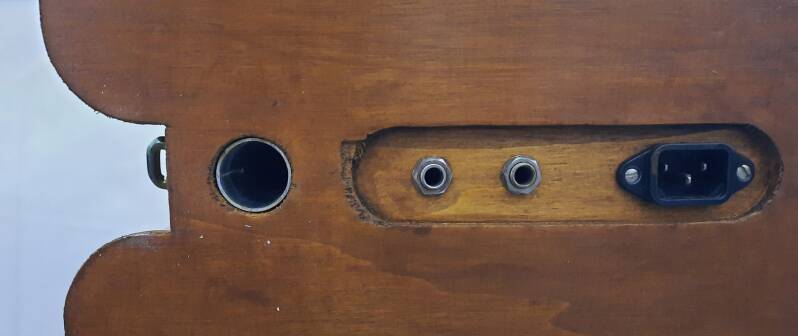
Some details of the center section. At the front, on the underside, is the hole for the adjustable leg. Also on the underside are two 12V DC outlets and the grounded inlet for the 230V mains.

Later, an additional electrical outlet was added on the left side (photo left). It's not visible because it's underneath.
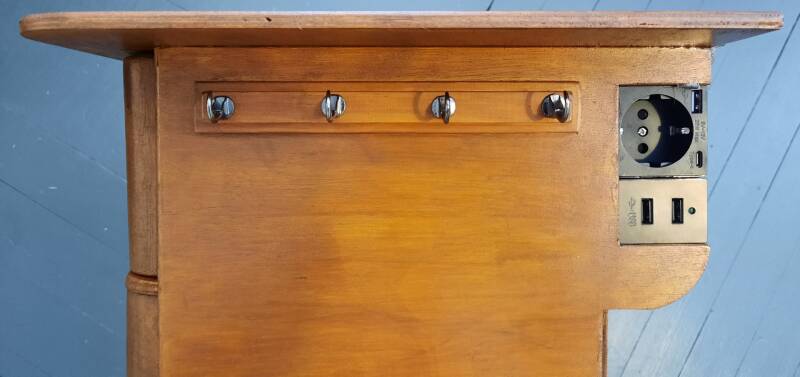
On the left: the 230V wall socket and USB outlets. On the right, a wall socket with USB outlets and two additional USB outlets. There are also four hooks for tea towels, etc.
The difference in size between the left and right side is due to the shape of the chrome wheel arch of the Eriba. The cabinet must fit nice around it.
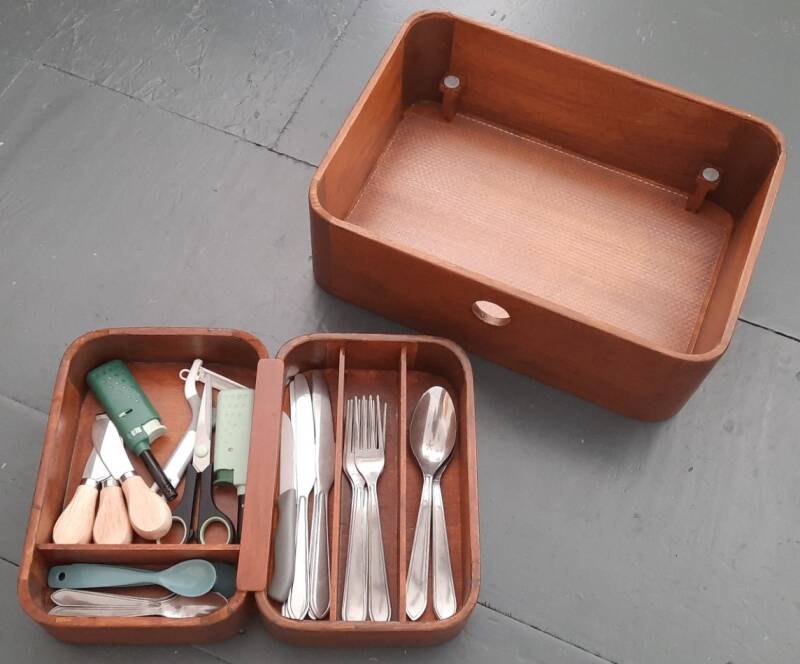
Afterword. Still, we weren't completely satisfied. Therefore, two additions: a cutlery tray and a fold-out shelf for extra space, such as for the coffee maker.
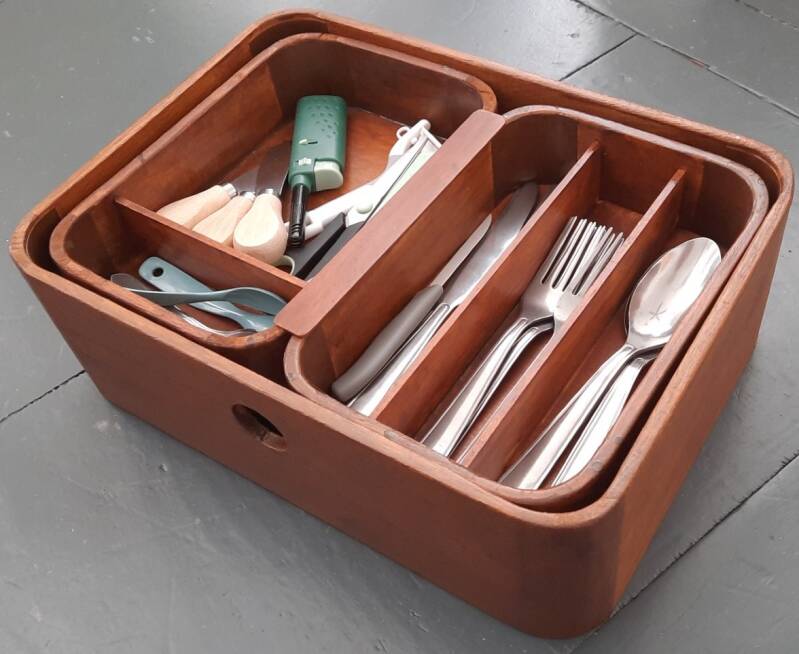
Cutlery tray: cut the small box in half and glue the two parts together with a new base. In the middle a "handle" to make it easier to take it out.

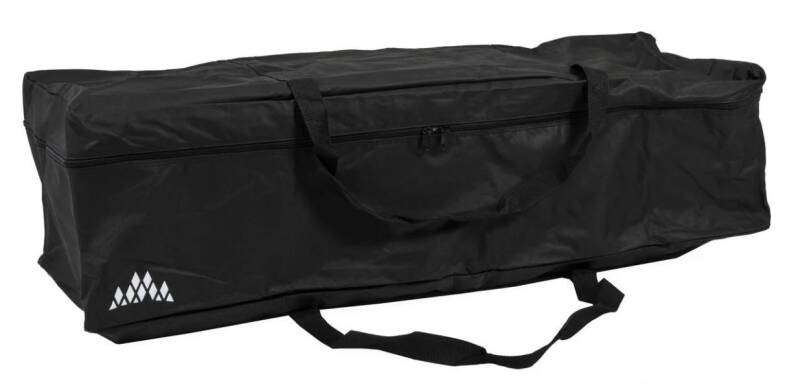
The extra space on the countertop was created using stainless steel folding brackets from China. They are available in various sizes. The photo shows the cabinet with the extra top folded down. This way, it still fits in the same storage bag we use.
The two left drawers hold our plates, cups, glasses, and bowls. The right drawers hold cutlery, placemats, and so on.
On the right photo is the storage bag we use for the outdoor cupboard.
Comments and questions:
Erwin: What does that red light in the middle indicate? Answer: That's a LED only showing there's power (at the campsite), and therefore 12V= available from the 5A power supply. We could also have made it flash as a pseudo-burglary alarm. But that's quite annoying when you're in your awning...
Erwin: One more question. Where does that 230V cable go? Answer: It runs under the caravan to the power connection at the rear. That's also for aesthetic reasons: we wanted 230V and USB outputs at the front, but not such an unsightly connection with a flap in the caravan wall. See also: Current meter
Maak jouw eigen website met JouwWeb