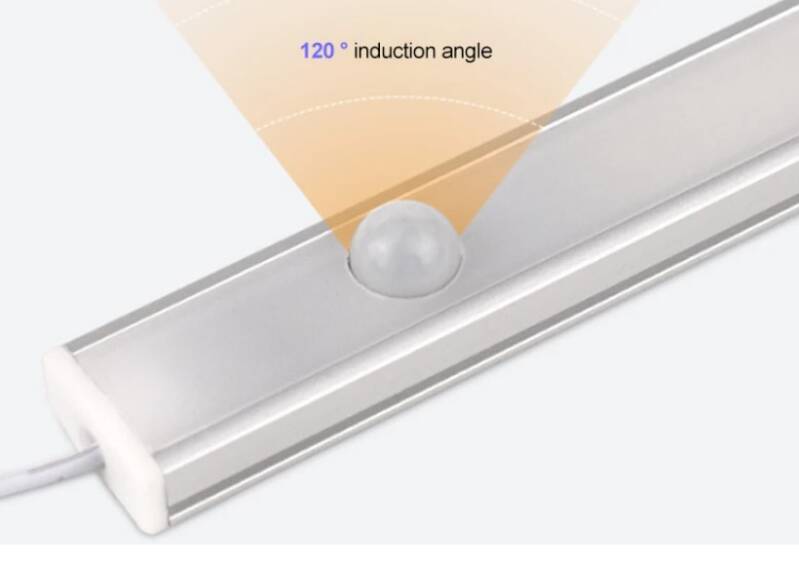
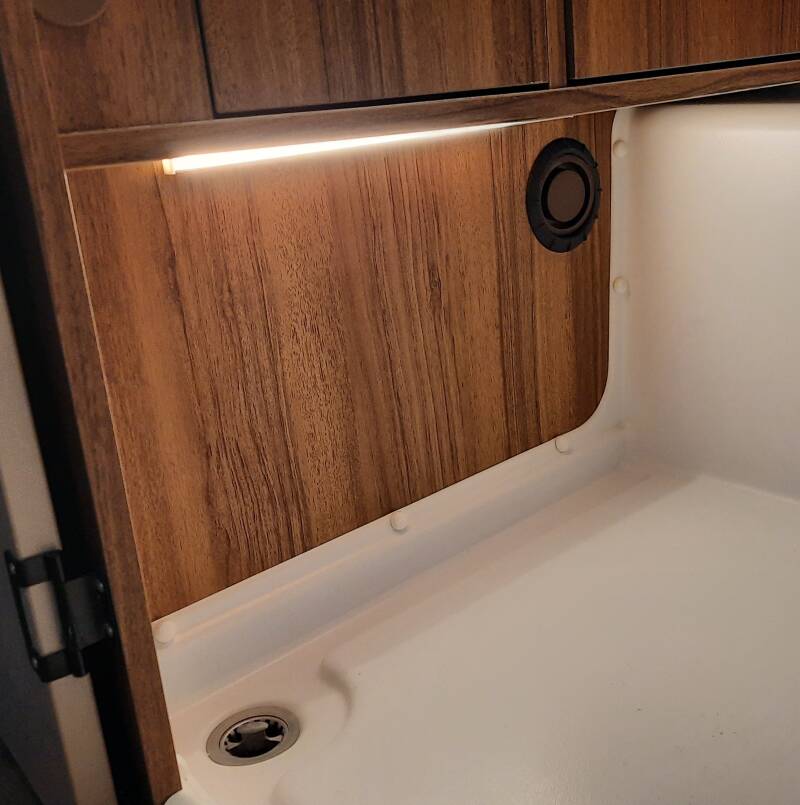
Bathroom, toilet: whatever you wanna call it. We like this part of the Eriba. But we're changing a few things. The terrible hanging of the bathroom door comes at the end. First, the lighting. A 30cm LED strip with a PIR sensor will be installed under the cabinet. This is completely invisible until you step inside, when the floor is softly illuminated.
Convenient light at night... We pick up the 12V DC power from behind the Truma heater underneath the wardrobe. The LED light is warm white, but we still thought it a bit too bright for nighttime use. That's why four 1N4001 diodes reduce the voltage slightly. The result: automatic, indirect, soft light on the floor. (The right photo also shows the semi-closed ring heater.)
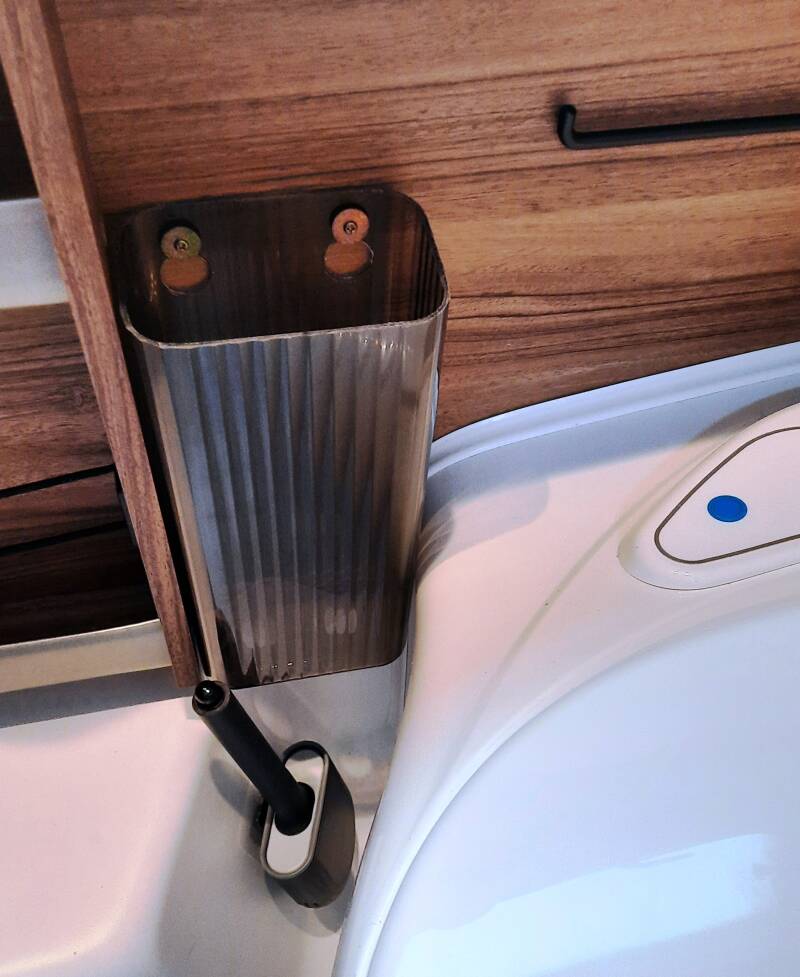
The less toilet paper in the chemical toilet, the better. We make a suitable waste bin from a pasta storage container. This is shortened to 24 cm and fitted with hanging holes and holes in the bottom. We also shorten a mini toilet brush slightly to fit in.
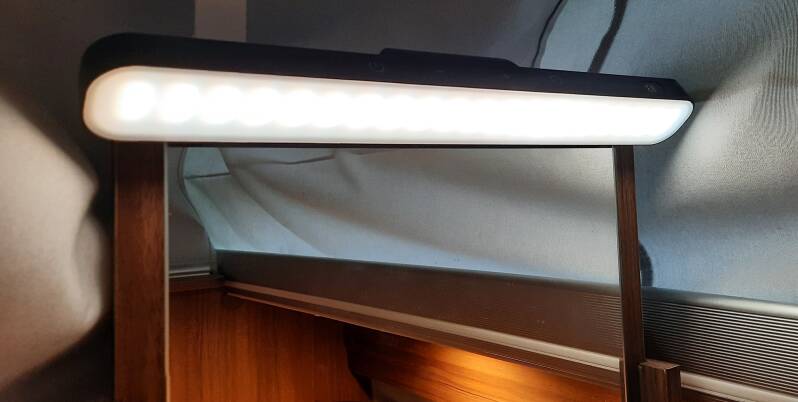
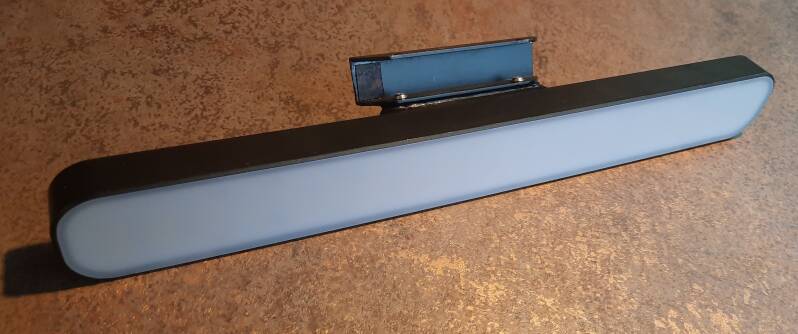
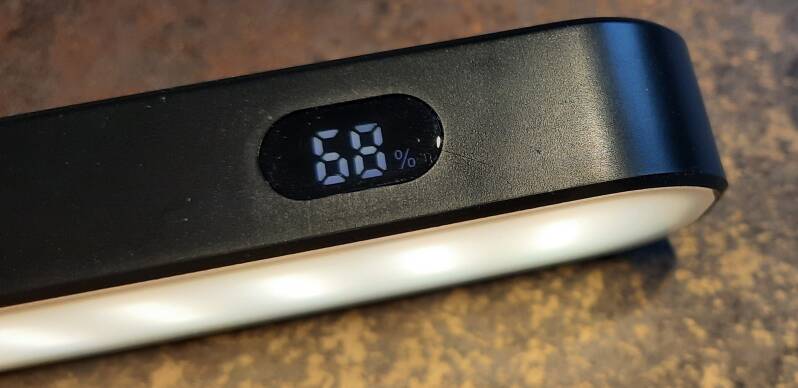
The Eriba doesn't have mirror lighting. We found a nice USB-rechargeable LED light that provides both warm white and bright white light, dimmable in five settings, and a handy battery status indicator. We attached a bracket (pictured top right) to it that slides over the mirror. It can remain in place with the pop-up roof down.

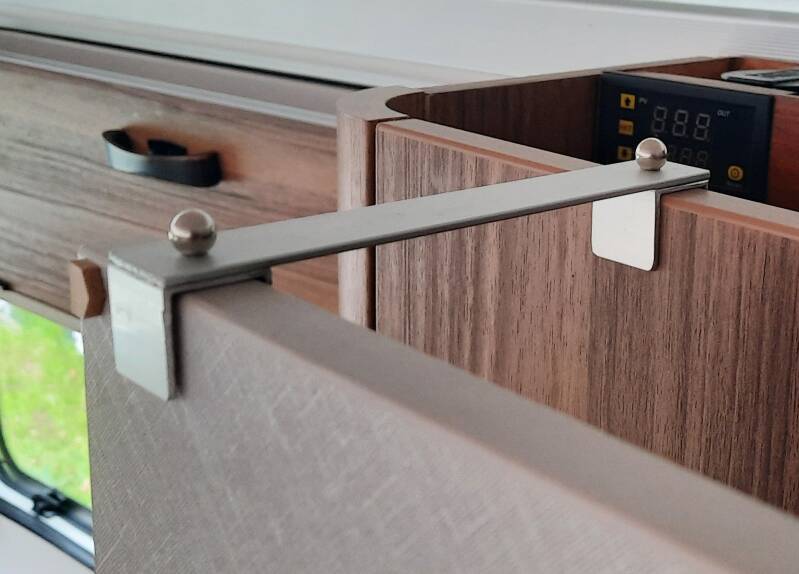
Small detail: when Marla is doing her makeup, the door keeps closing or opening. She wants to have moving space and an open door. But the caravan is never 100% horizontal... You could use a magnetic closure or a piece of Velcro. We opted for a little spacer. Then there is no need to drill any holes.
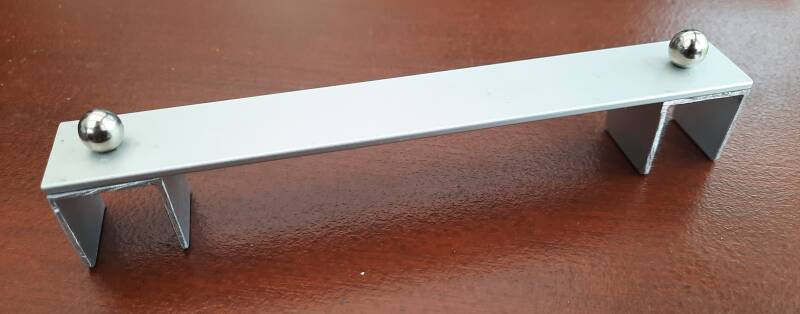
We made this simple spacer from aluminum profiles.
Bathroom door
A recurring complaint is the bathroom door. At first, we did not want to address it, but since this is common at every new Eriba, we are saying something about it after all. (Eriba itself never does anything about complaints; this problem has existed for years. Here are a few examples of emails we receive regarding this subject.
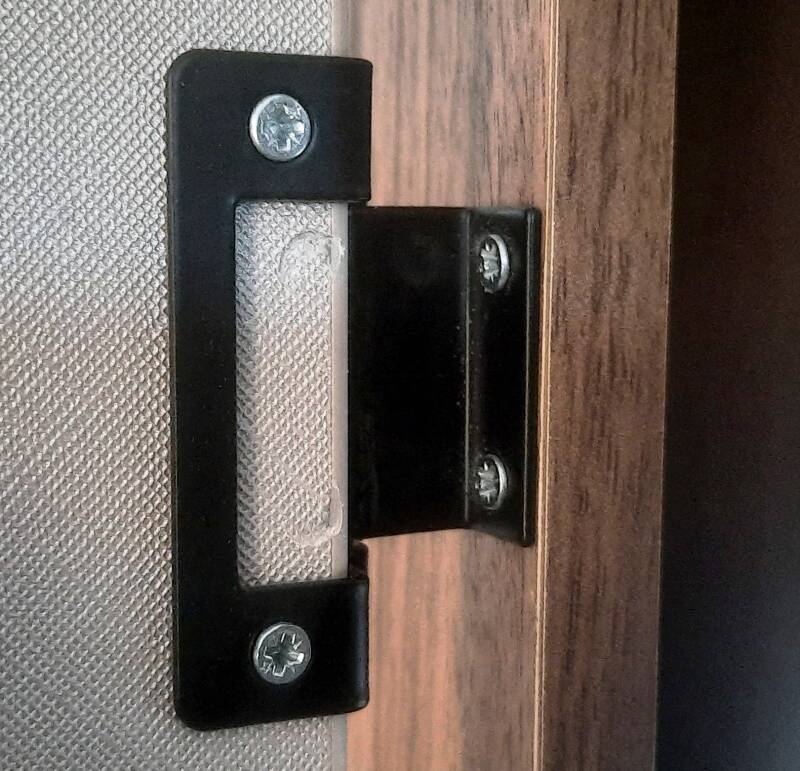
Simon W. Our entire bathroom door fell off during a ride: severely damaged because the hinges completely blew off. It turned out the hinges were "attached" with short (1 cm) screws. We repaired the damage as best we could and reinstalled the door with a piano hinge from top to bottom.
Answer: Indeed, Simon, the way the door is mounted is particularly poor (photo on the left). One option is to replace all the screws with M3 screws that go all the way through the wood. If these are secured with a washer and nut, it can't come loose, but that certainly doesn't look nice either. For that reason, we replaced the screws with ones that are just a centimeter and a half longer and secured them with glue as they are screwed in. Hopefully, that will be sufficient.
Ralph S. I’d like to show how I solved the bathroom door problem. With a latch that secures the door but also prevents it from sagging while driving.
Reply: Thanks, Ralph; we’re sharing the photo so others can benefit from it too.
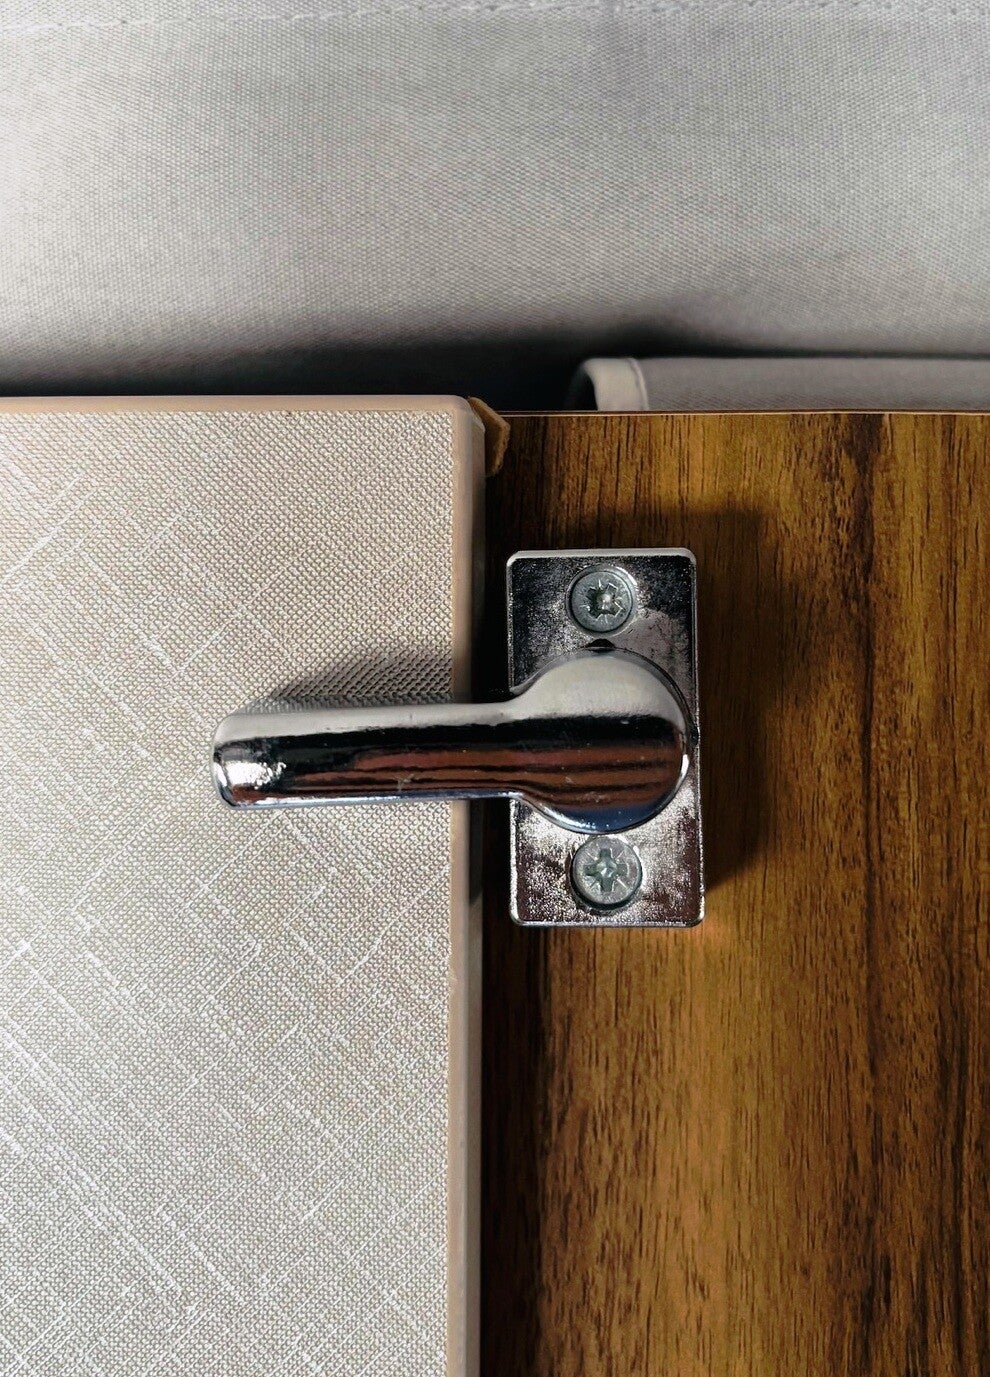
Ralph gave us an idea. We’ll attach a small sliding bolt to the inside of the door. The bolt will slide into a long sleeve that we’ll drill into the side wall.
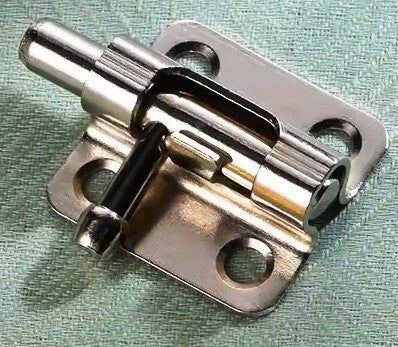
Photo coming up
Other comments and questions:
Bernadet W. Why is the sensor light at the bottom of the bathroom and not at the top? Answer: Yes, it could have been at the top, or next to the mirror. You could then simply get the 12V= power from the adjacent wardrobe. However, we wanted to keep the bathroom as intact as possible and hide the sensor light from view.
Maak jouw eigen website met JouwWeb