This section is about the Truma heater:
1) Installing the Ultraheat electric (auxiliary) heater in the Truma heater;
2) Improving the ring heater and insulating it;
3) An alternative to battery ignition;
4) Securing the mounting (do this anyway!).
5) Improving thermostat control.
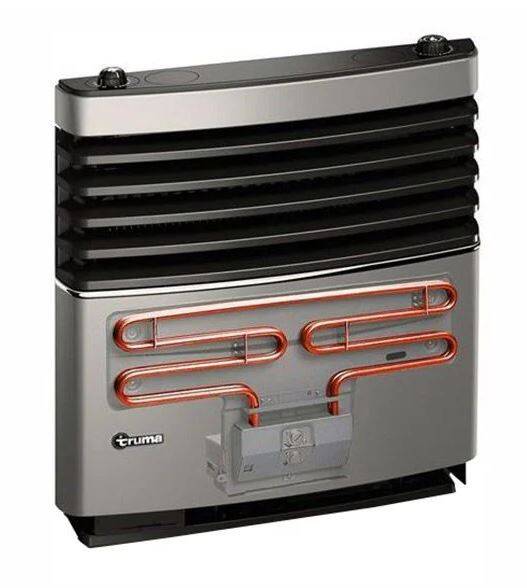
1. Installing the Truma Ultraheat
Here, we'll show you how to install an Ultraheat in an existing heater, with a few warnings:
1) In some caravans, this can be done without removing the heater, but not in the Eriba. The entire Truma has to be removed, including disconnecting the gas supply from the underside of the caravan and removing the fan from the ring heater.
2) Due to the 2000-watt maximum output, an additional fuse group is required;
3) Recent Truma versions have a pre-fabricated rear wall. Older versions require a drill and saw;
4) Only do this if you have considerable DIY experience, and make sure you have sufficient tools and safe work gloves.
5) The efficiency is low: a simple electric heater with half the power consumption performs more efficiently;
6) Also, take a look at the hole in the bottom: see the "Exterior" menu item "## (coming soon) Making your heater insect-proof."
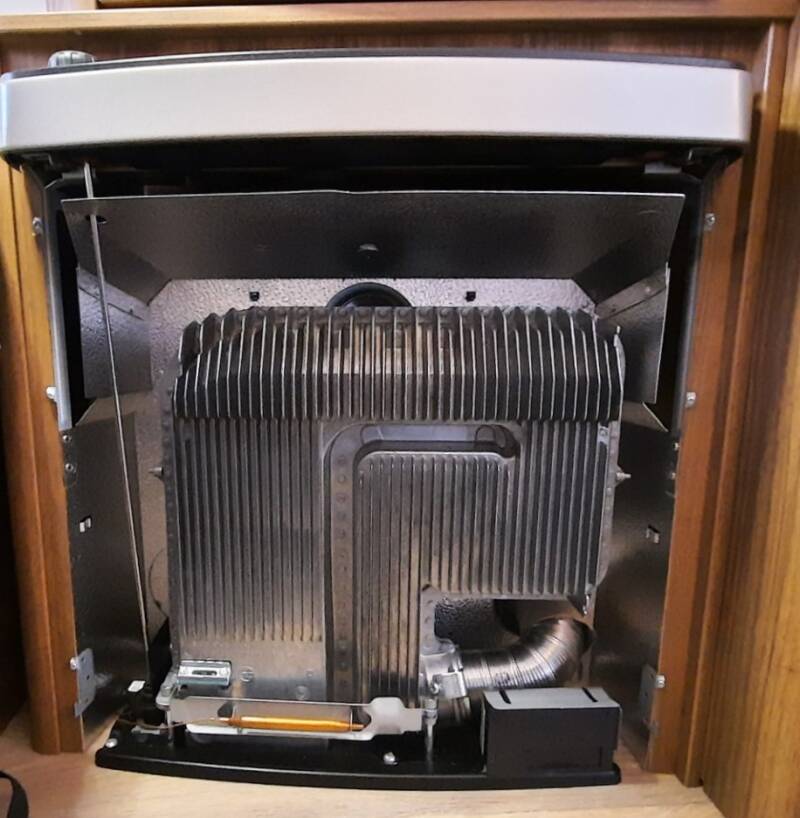
Installing the Ultraheat! First, we remove the front panel, pull off the gas knob, remove the control rod from the knob, and disconnect the flue outlet. (Tip: always take pictures of how it's installed...) We remove the ignition unit on the bottom right. Under the caravan we disconnect the gas connection with a 17mm wrench (note: it turns left!).
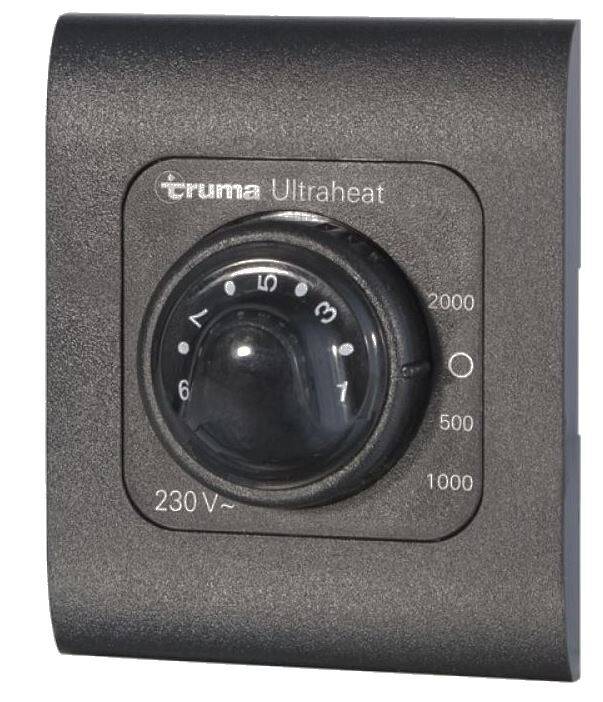
Now, successively loosen the six small screws that attach the back panel to the side, the five bottom screws, and the three screws holding the fan. (Note: don't unscrew the last one completely. The fan can be removed and replaced by sliding it over the screws; see the tabs in the photo.) Now that everything is loose, the back panel can be removed to attach the Ultraheat with screws, including the sensor. See the Ultraheat installation instructions for this.
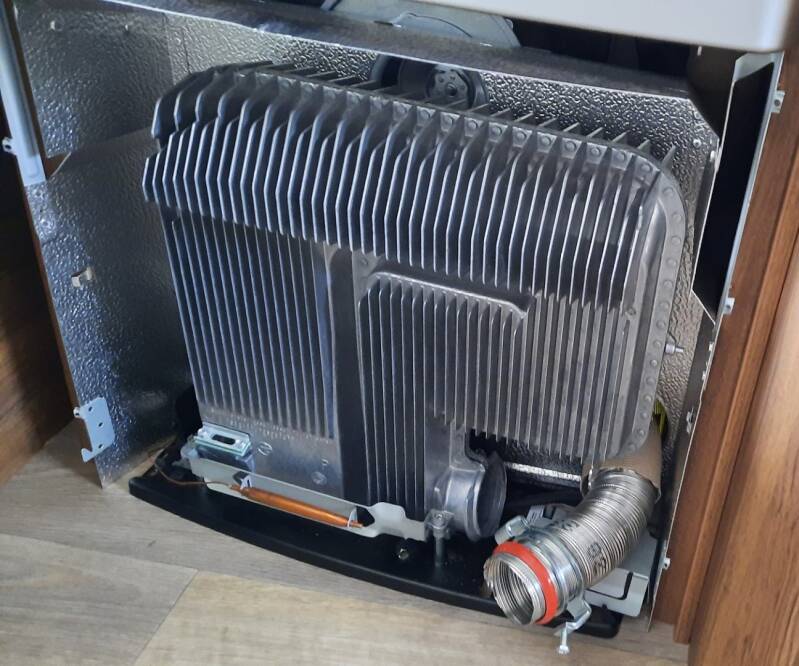
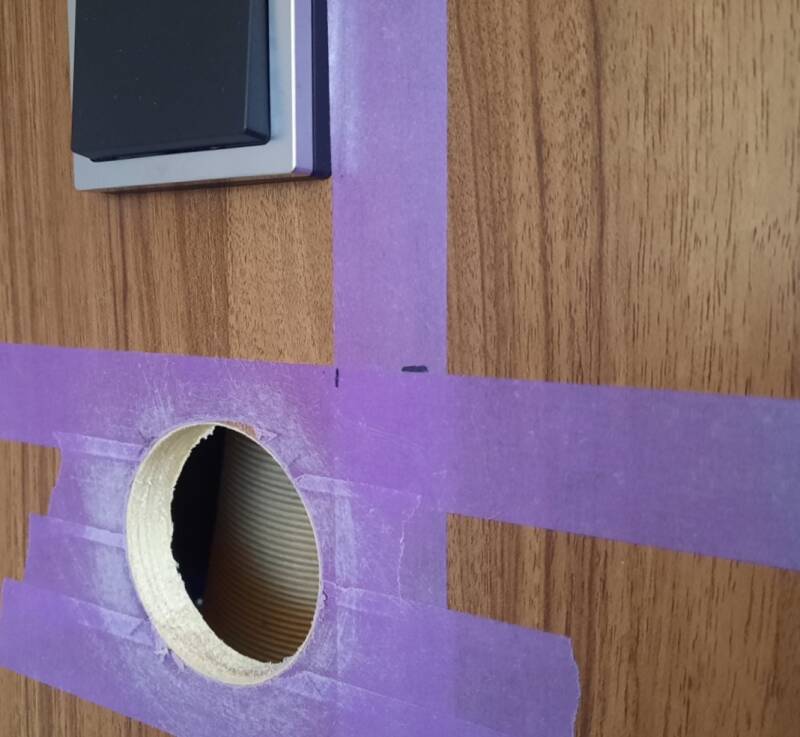
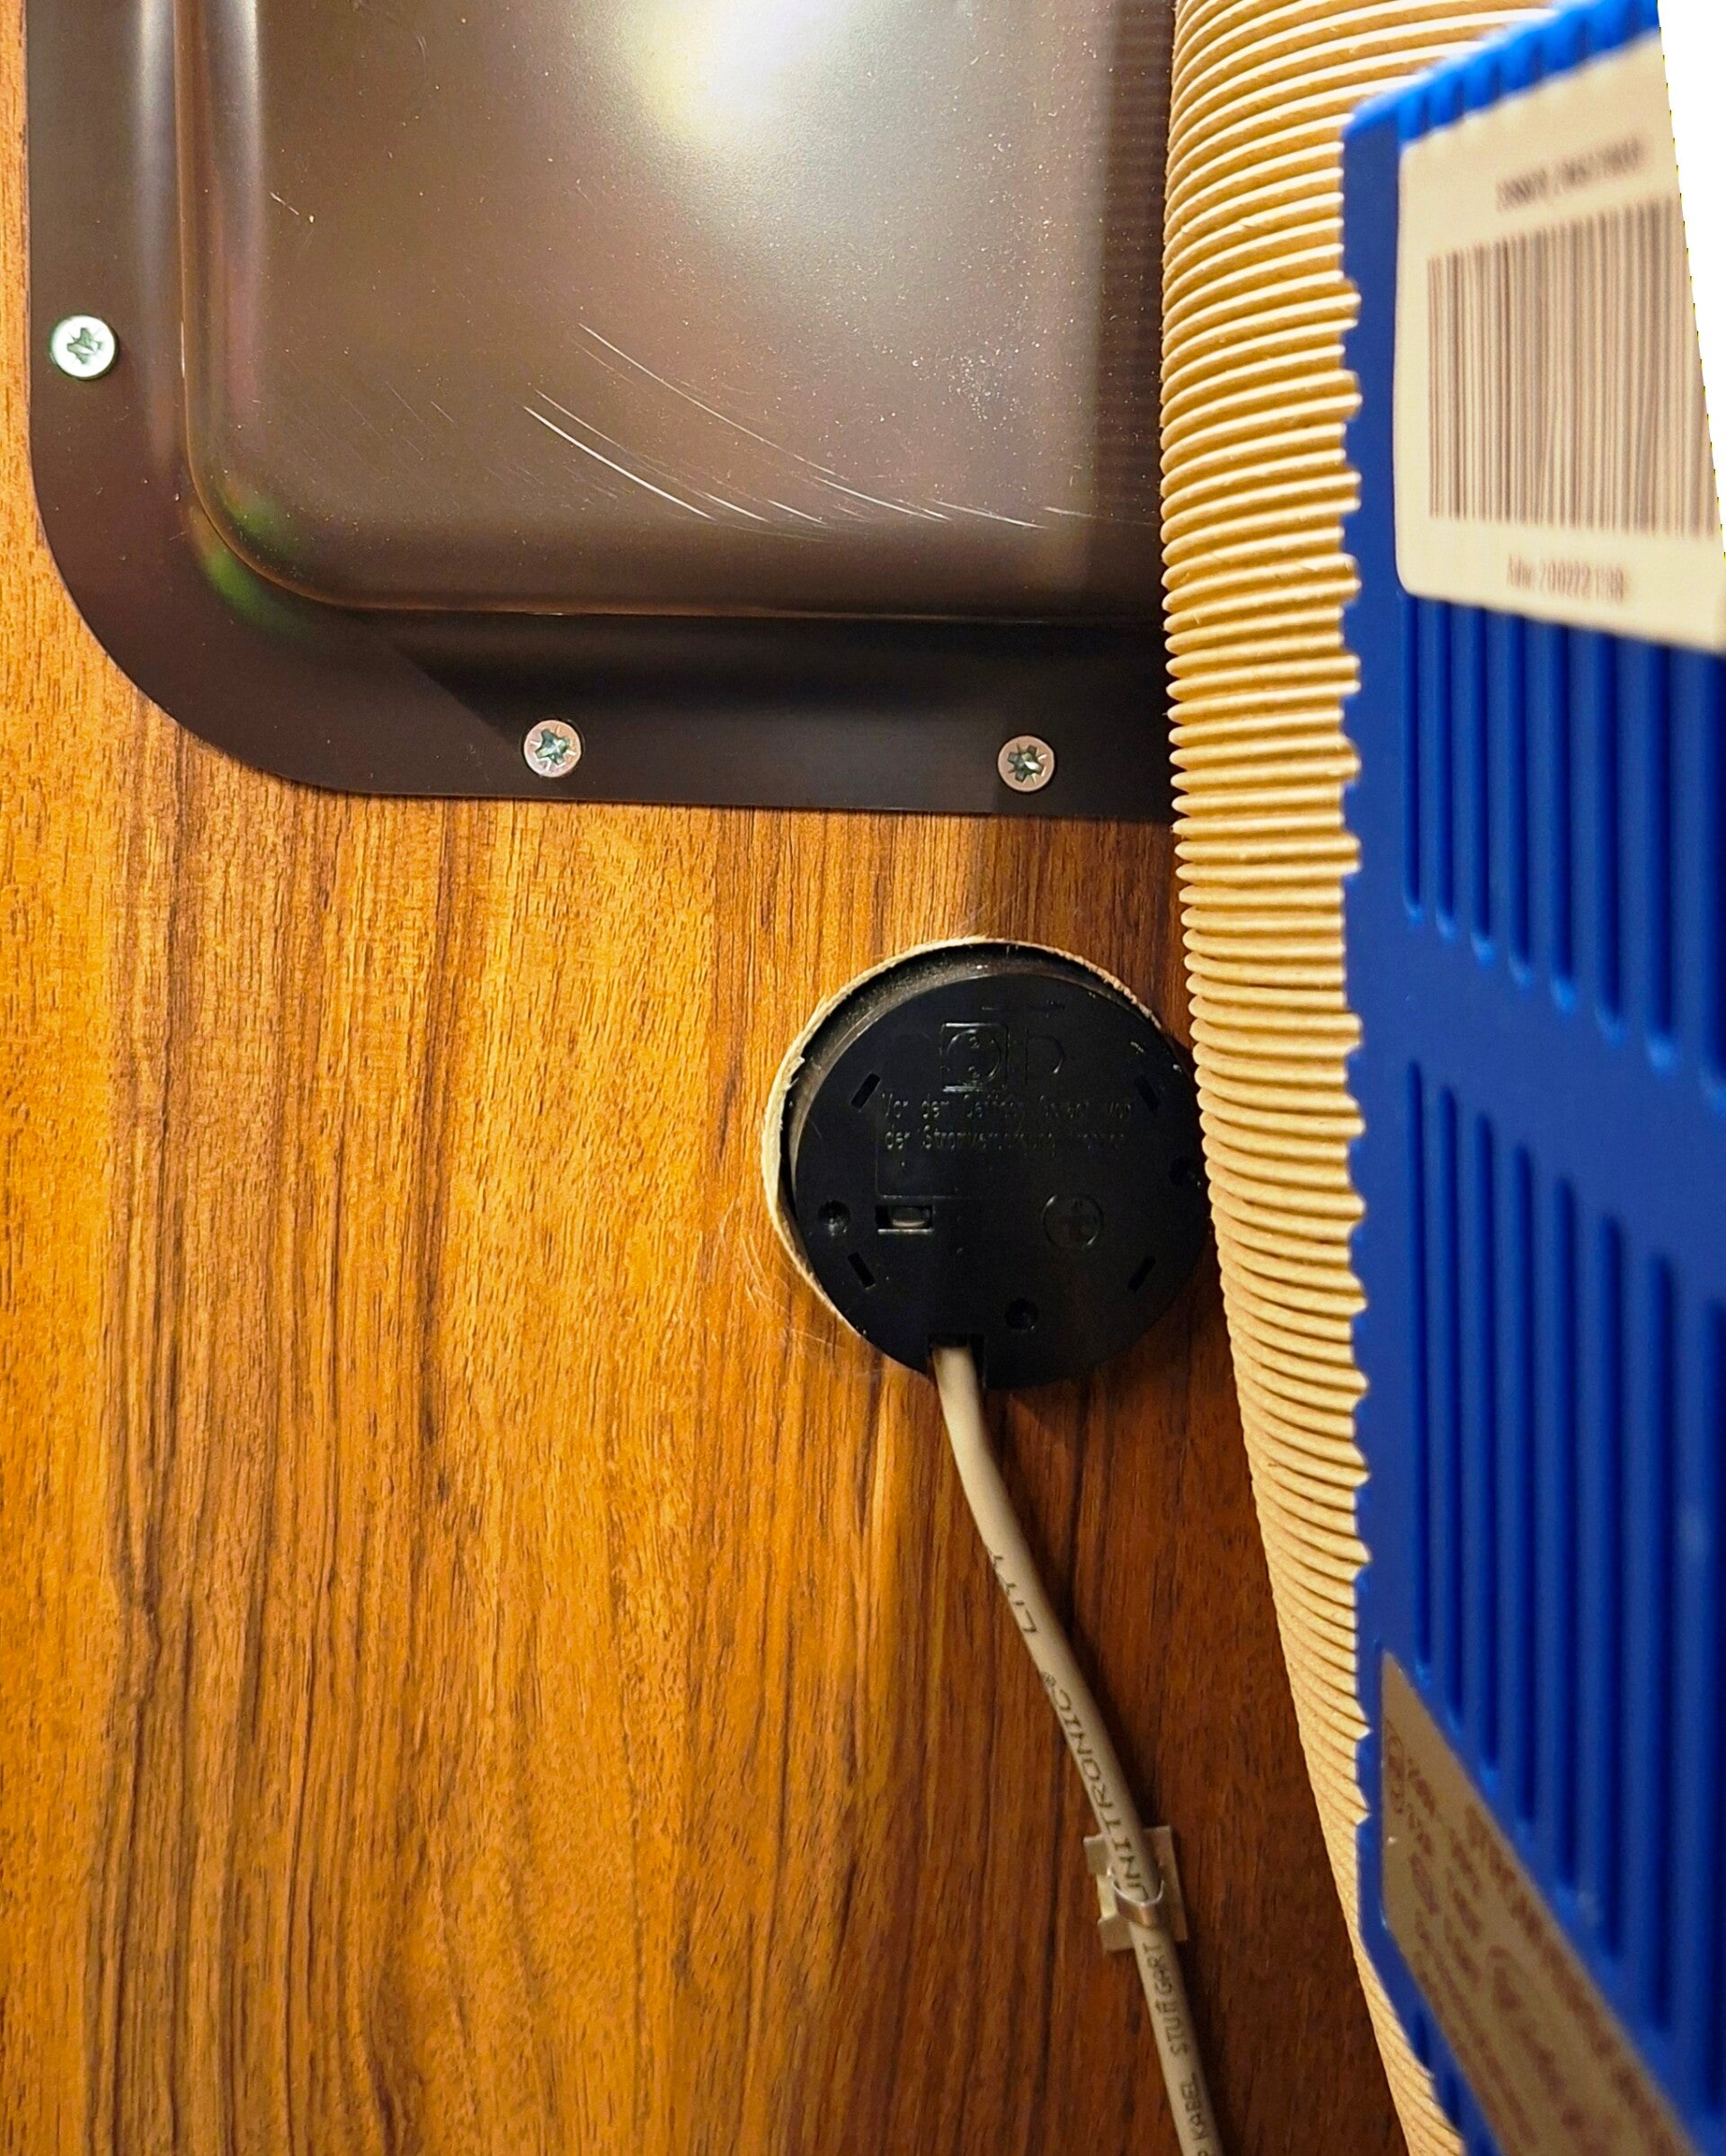
Mount the Ultraheat to the aluminum back wall (see photo left) and attach the wiring to the electrical unit. For the controls, a 55mm hole needs to be drilled in the cabinet wall. We'll tape it off to prevent damage. Off we go: run and secure the wiring, reinstall the heater, and reconnect the gas supply at the underside of the caravan. It works, but in 2024, we still have Fred Flintstone's technology.
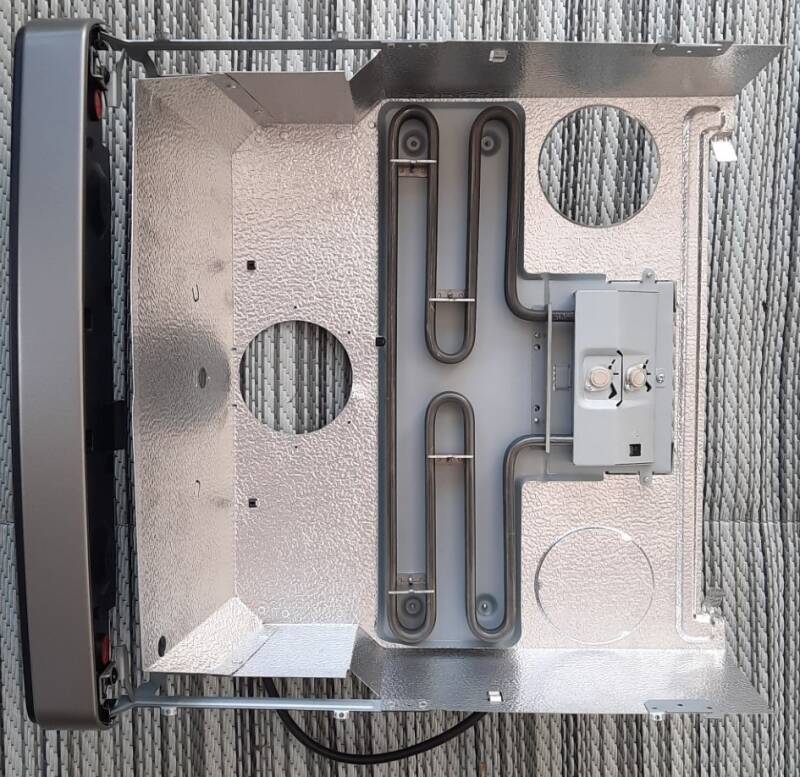
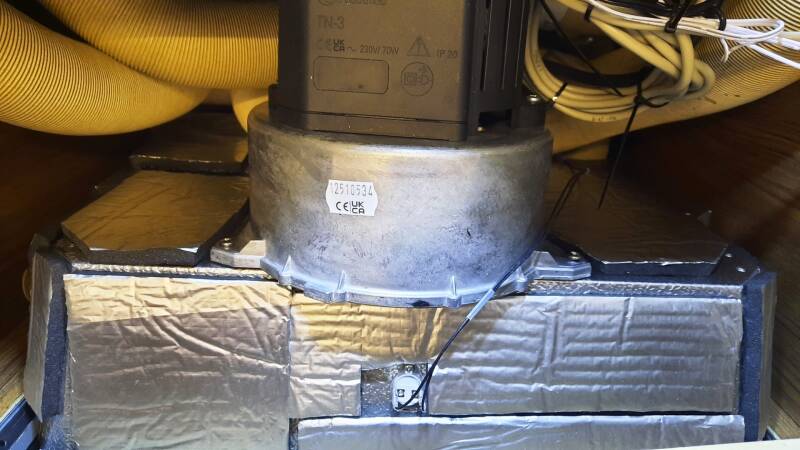
2. Adjusting the ring heating
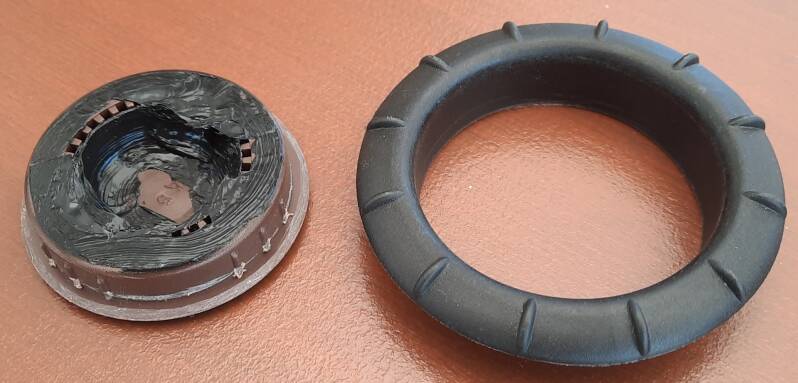
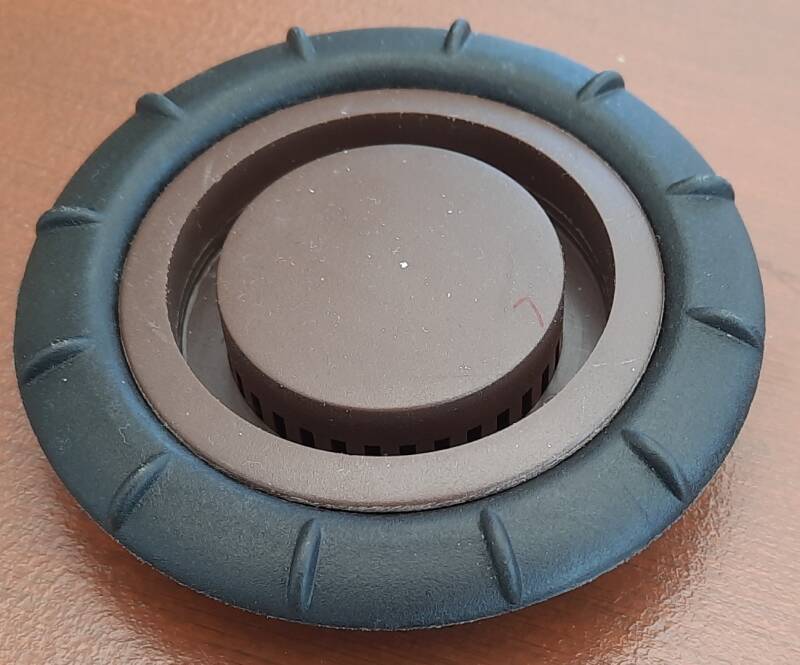
The (optional) ring heater is rather insignificant and noisy. Because the fan is screwed directly to the aluminum back panel (sound box) without rubber mounting, the AC voltage hums.
If I had better access, I would have replaced the 230V AC fan with the 12V DC version (replaced the TN3 with the TEB3). That would at least eliminate that annoying hum. I would also have tried encasing the suspension in rubber to dampen the noise any further.
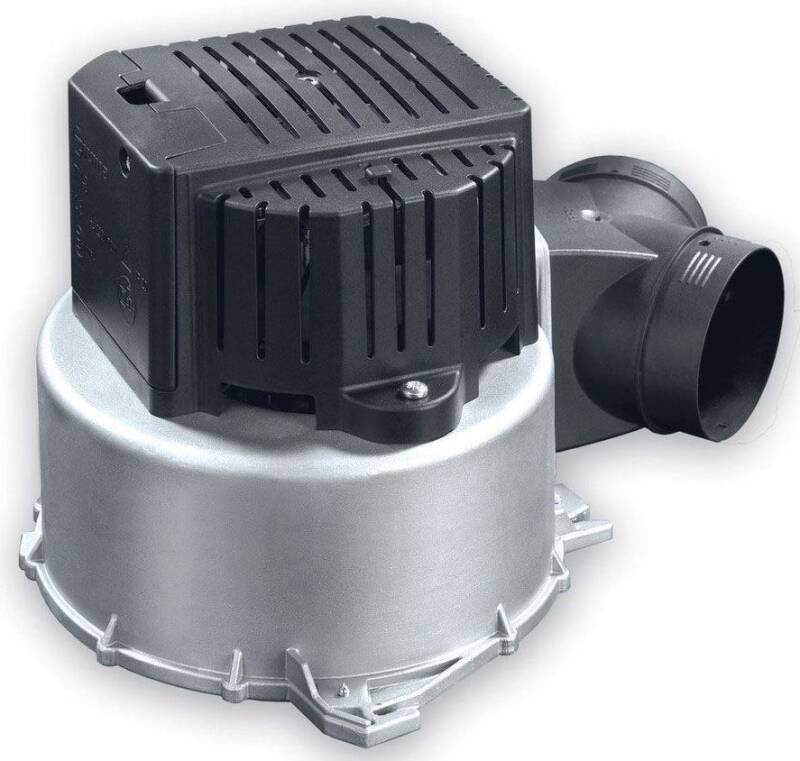
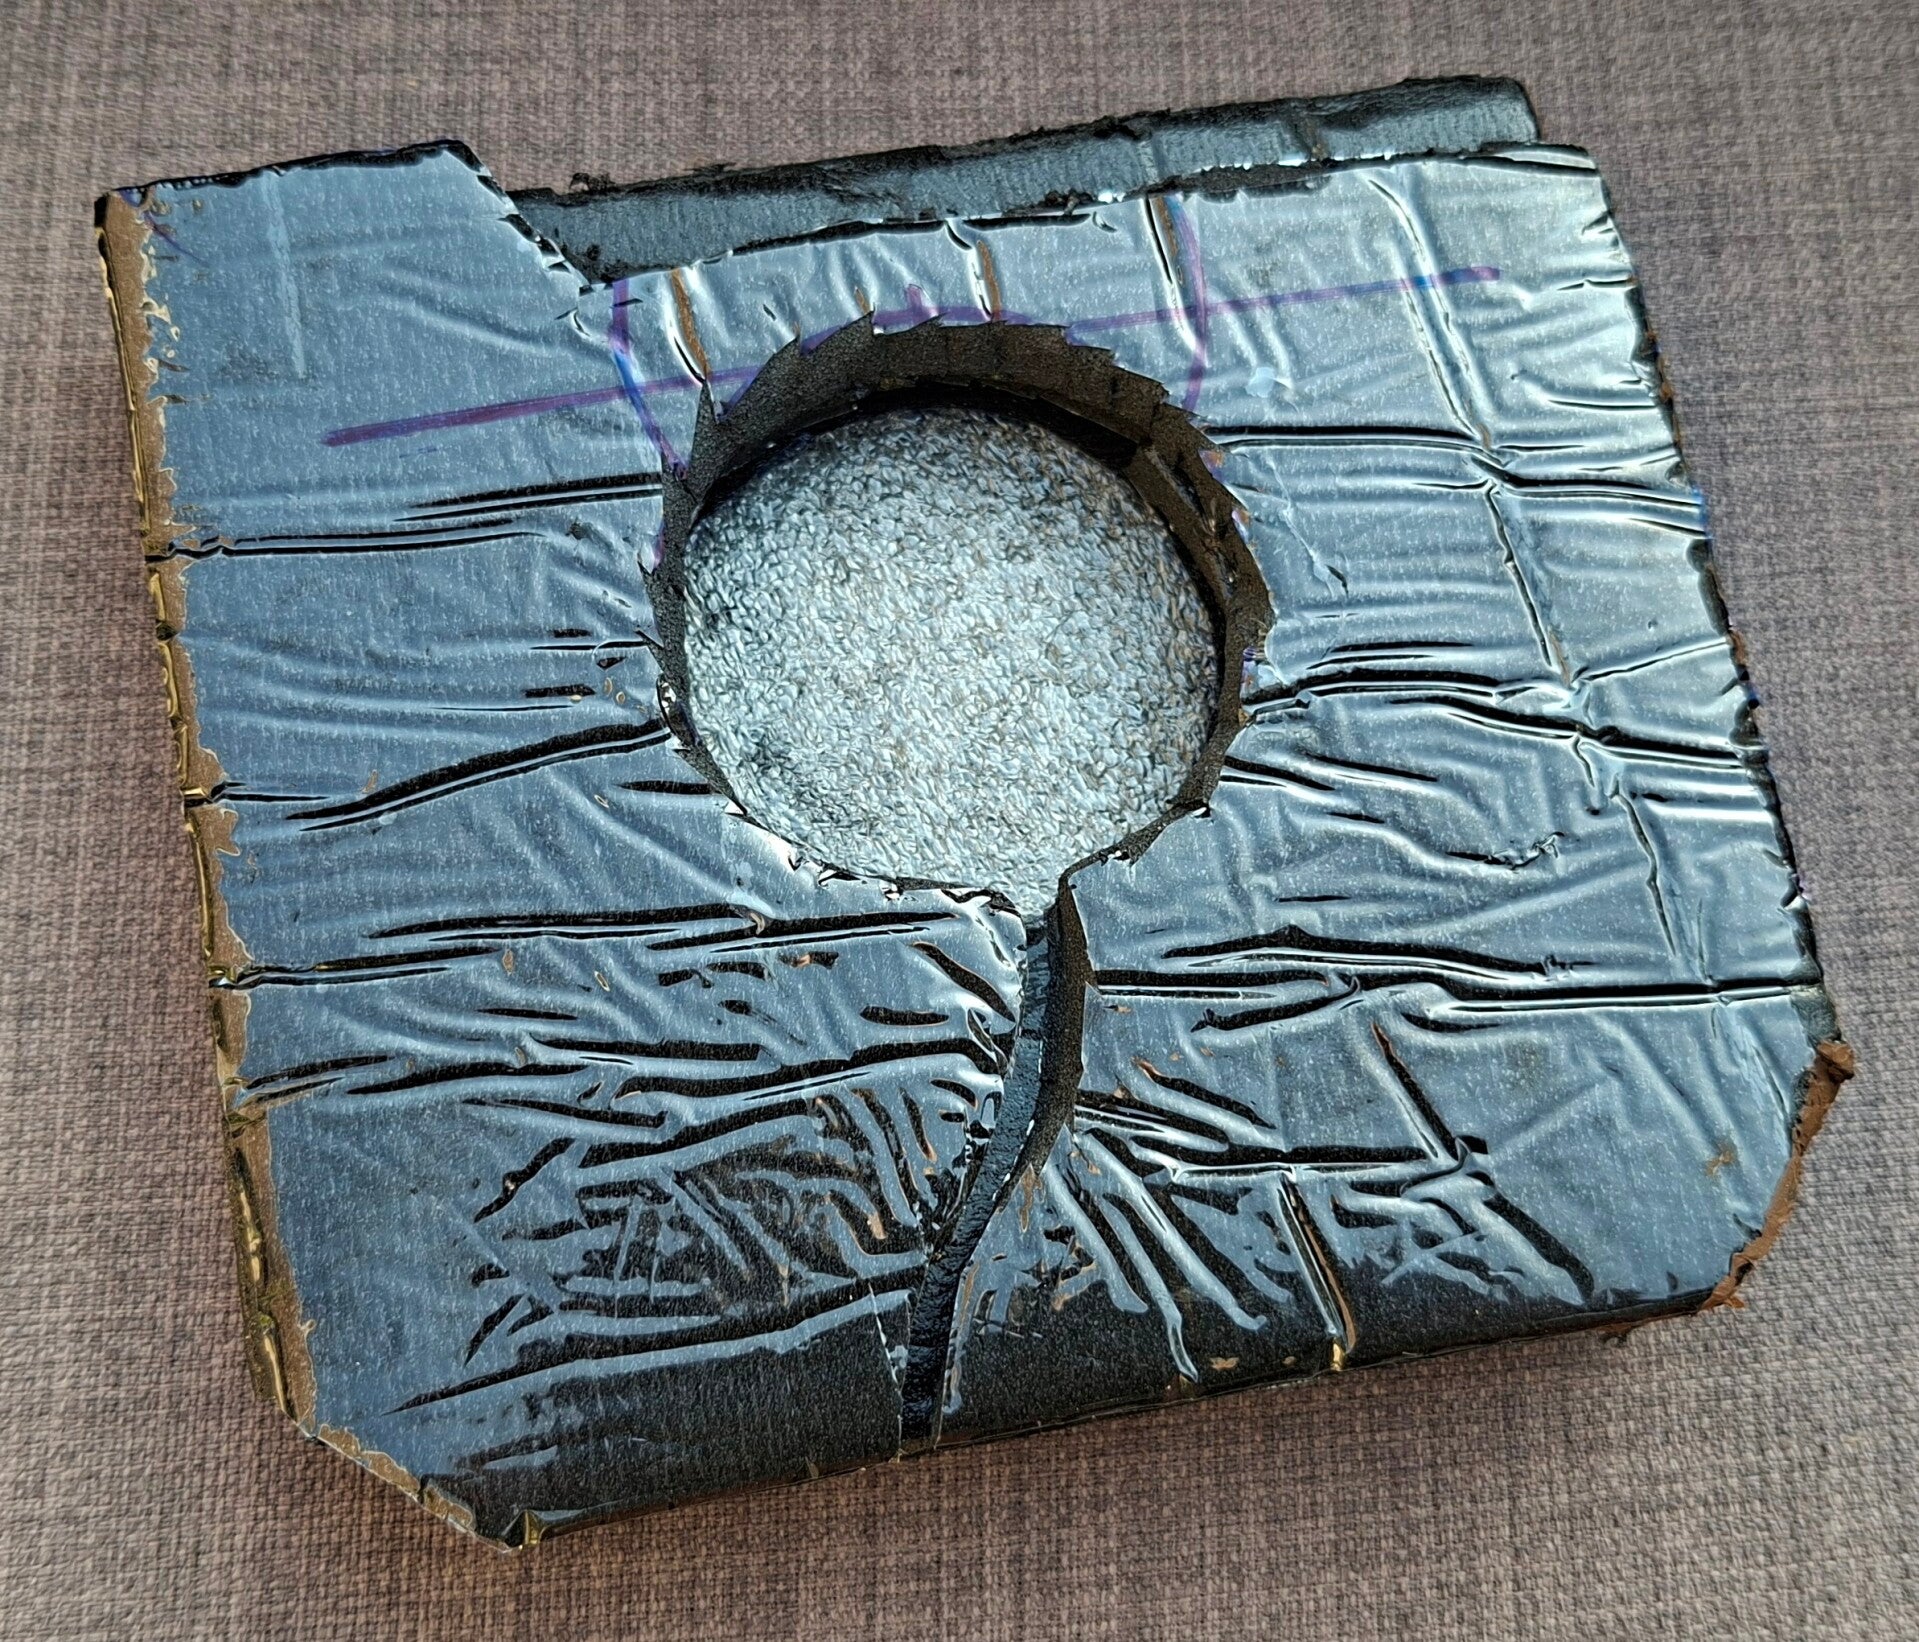
Priority: Trying to dampen the fan's intense hum (caused by 50Hz AC voltage). We're applying sound-dampening insulation to the aluminum back of the Truma heater. An added benefit: the heat is utilized more effectively, and the heater's efficiency increases.

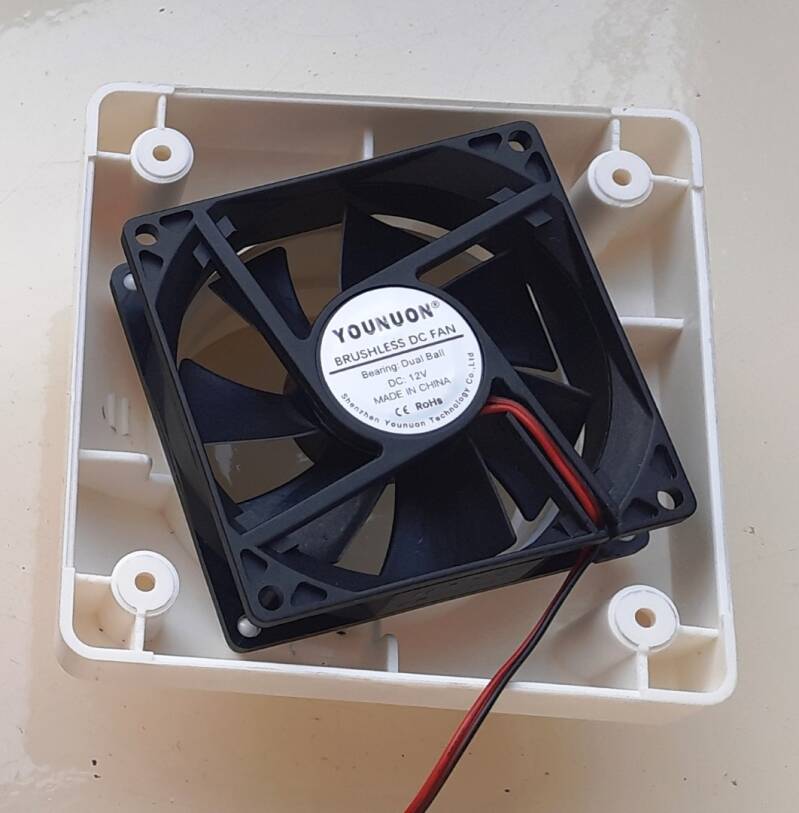
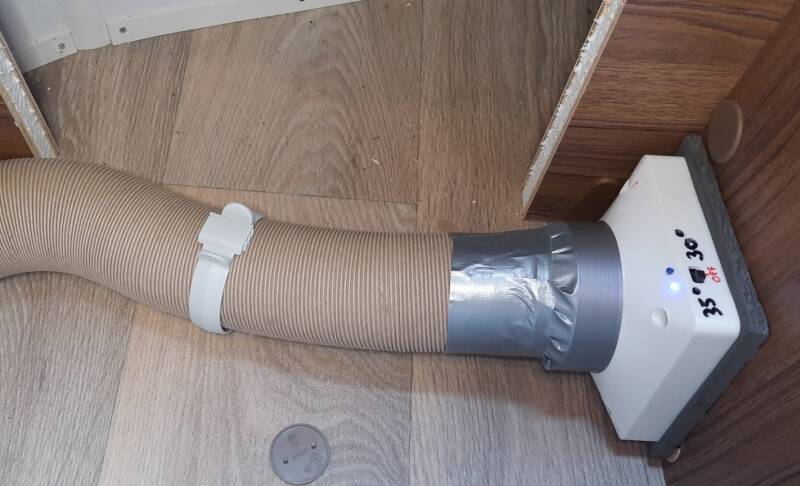
And furthermore. The heat distribution of the ring heater across the three outlets is poor: the bathroom gets very warm, under the bed is average, and in front of the small benches it remains relatively cold. We are going to improve this. 1) We will significantly restrict the outlet in the bathroom. 2) The outlet near the small benches will get its own booster fan with a thermal switch.
Turn off the ring heater in the bathroom (toilet area) by removing the rotating valve and gluing in a grille that's sealed shut enough to leave only a few holes for the warm air to flow into the bathroom.
More than enough heat...
Additional fan at the front near the benches. It activates with temperature sensors (selectable at 30 or 35 degrees). Now the heat distribution of the ring heater is okay. The main fan can be set to a lower setting, which reduces the noise considerably. (The sensors are located on small aluminum fins in the airflow; I forgot to take a picture.)
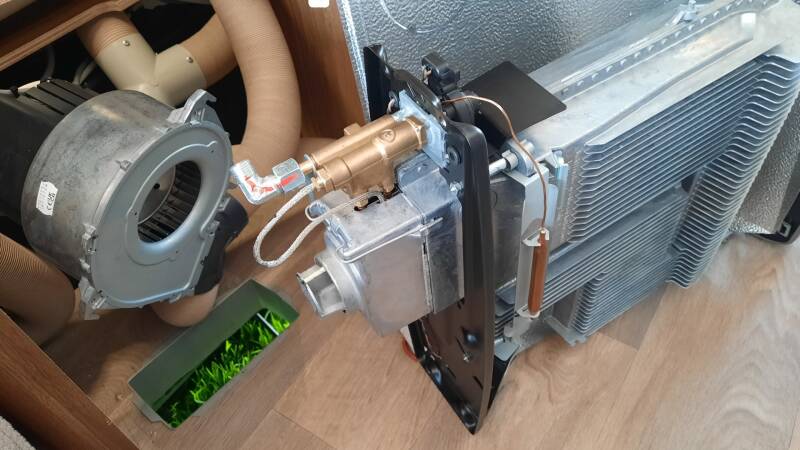
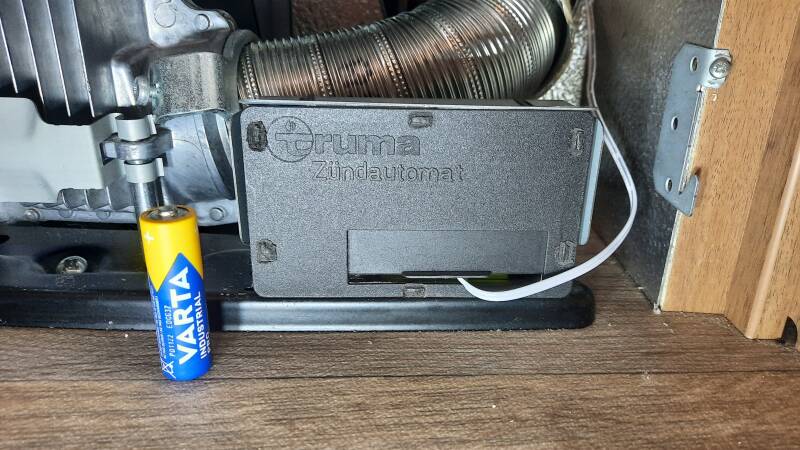
3. Ignite without battery
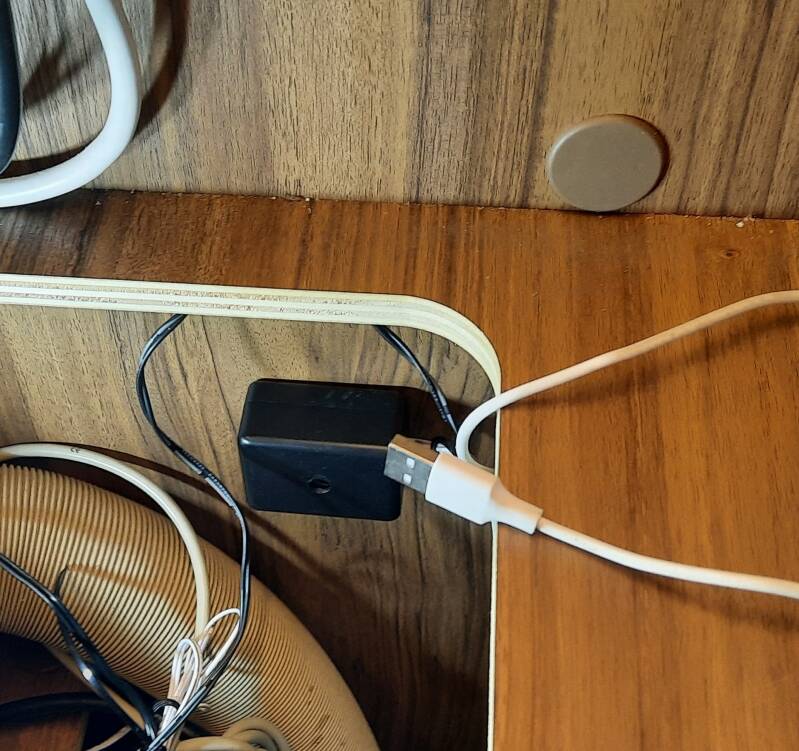
The Truma heater's ignition unit is quite hidden, and "preventatively replacing the battery every heating season" (user manual) is nonsense, and we don't want to. We're making a dummy AA battery and powering it with an LM317 regulator set to 1.5V DC. The power source for this is the 12V DC we had running through the cable duct in the wardrobe to the back of the Truma heater. And: if there's ever a power outage, there's a USB plug to ignite the gas heater with a 5V DC USB power bank. (Or you can replace the battery...)
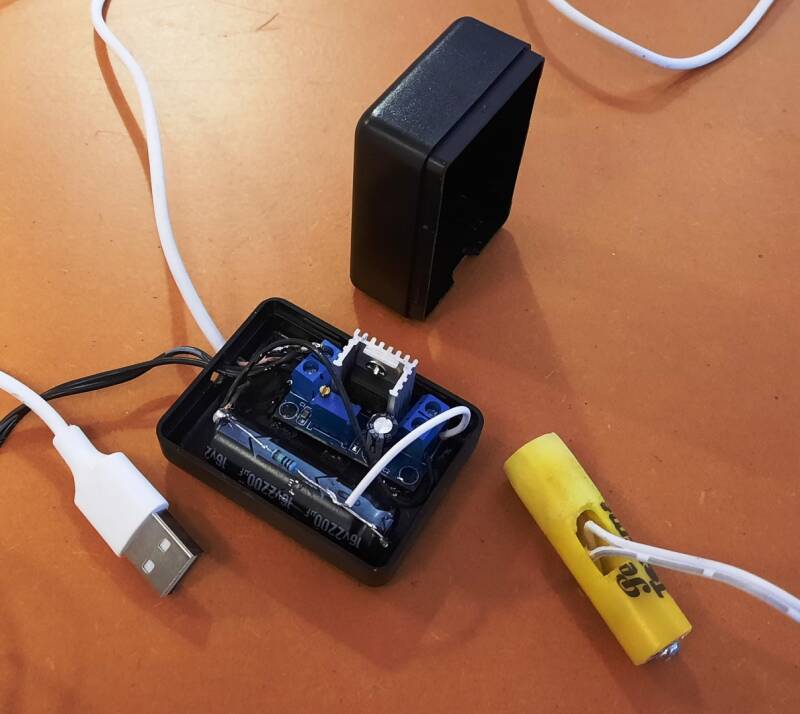
Photo left: The dummy replaces the AA battery, now with a cable coming out.
Photo right: The mini-box is mounted behind the heater. The LM317 regulator is preceded by two 1N4001 diodes connected to the positive side of the 12V DC and the positive side of the 5V DC USB. A 2200 uF capacitor has also been added.
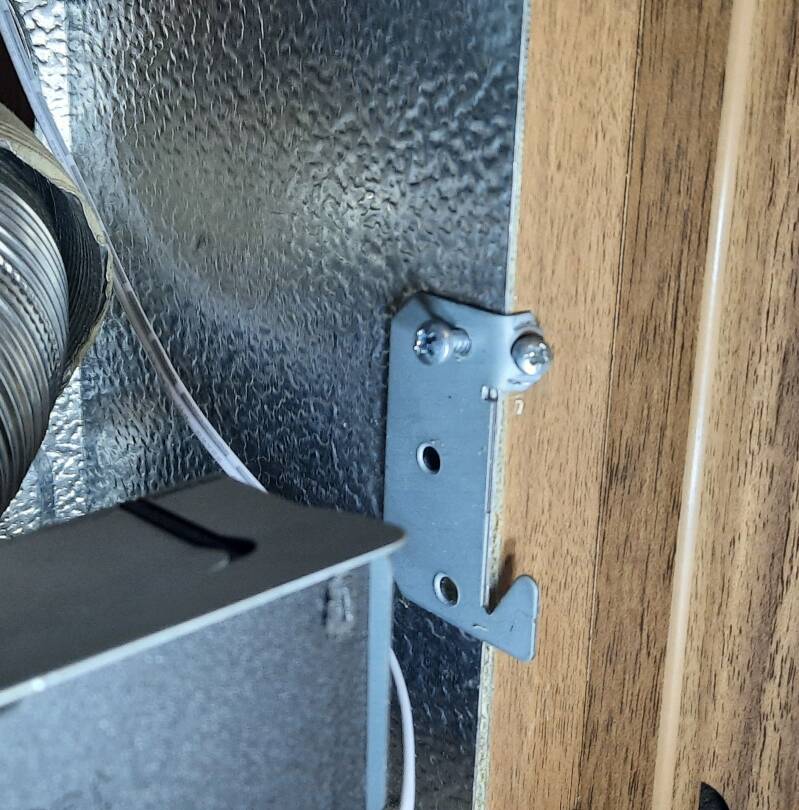
4. Mounting the Truma heater properly
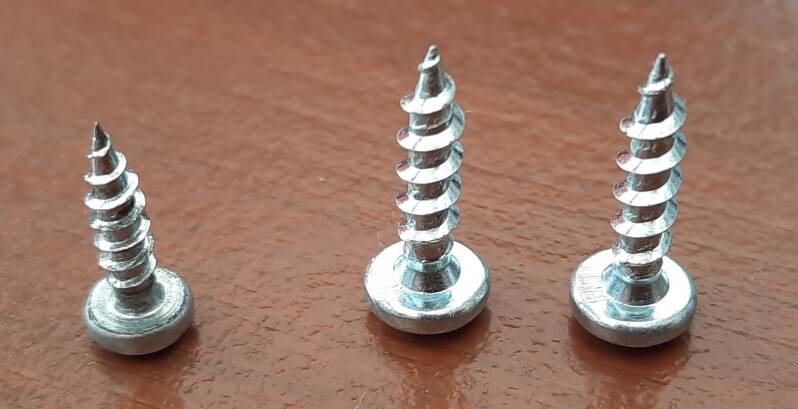
There are a few large screws at the bottom that secure the Truma heater to the base. But the mounting of the aluminum back panel is abysmal. Six tiny screws in the wood. The top right side of the heater came forward. Tip number one: replace the Eriba screws (the one on the left in the photo) with a larger, better screw like the ones on the right.
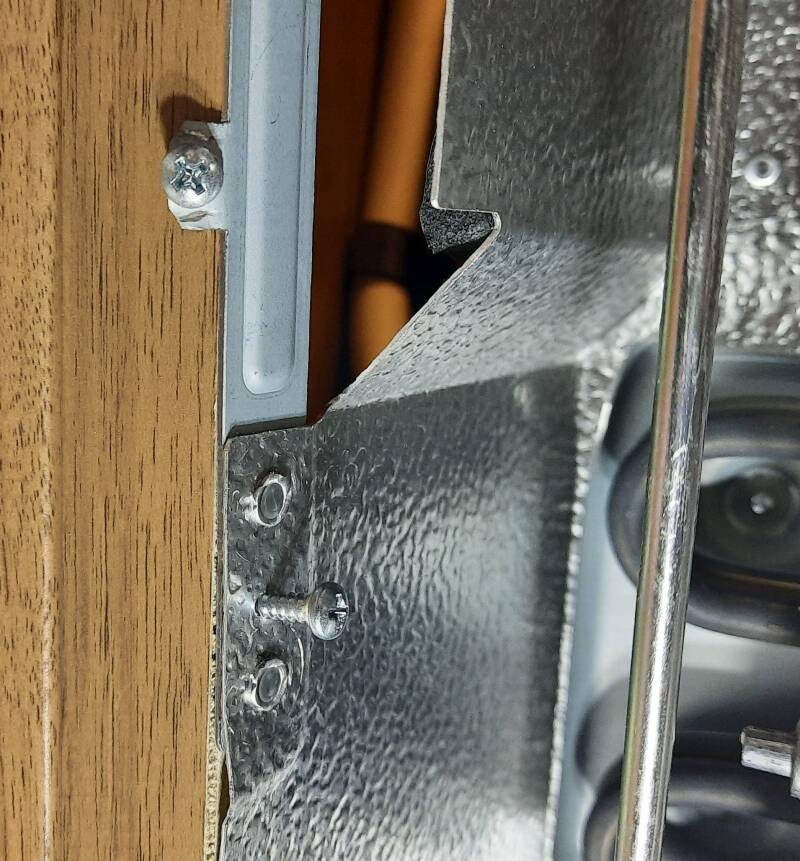
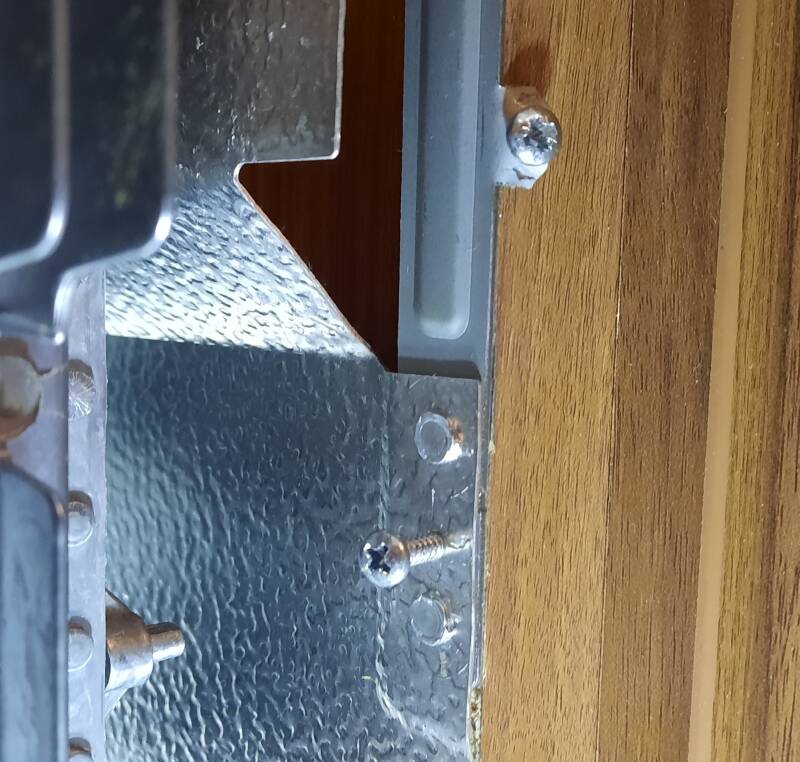
But even more important are four screws that Eriba omitted (why?). These screws are perpendicular to the structure and can also be much longer. See below the half-turned screws on all corners. (Half-turned for clarity.) If these screws are properly tightened, the Truma heater is indeed securely fastened. Shame on Eriba.
5. Improving thermostat control.
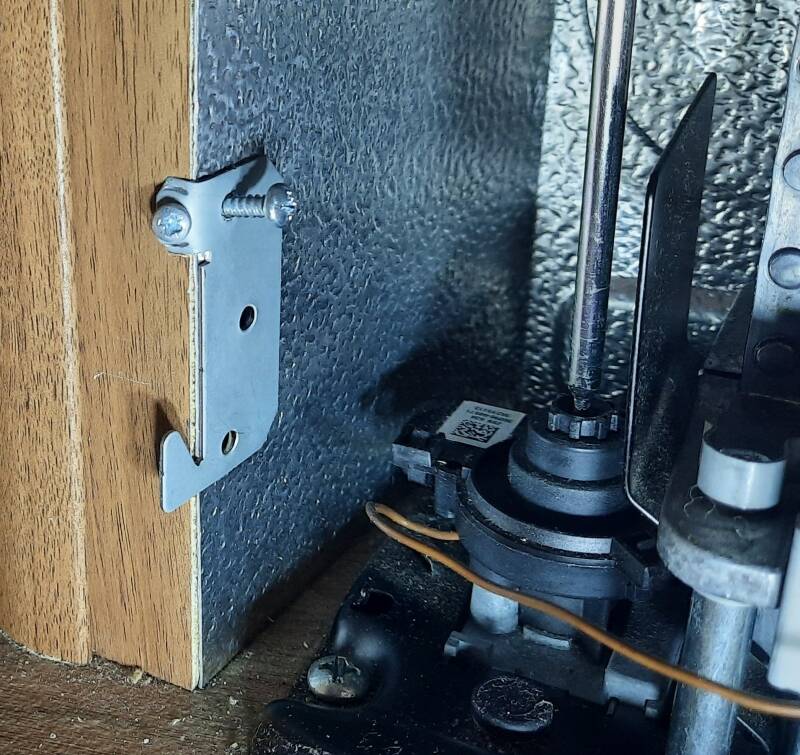
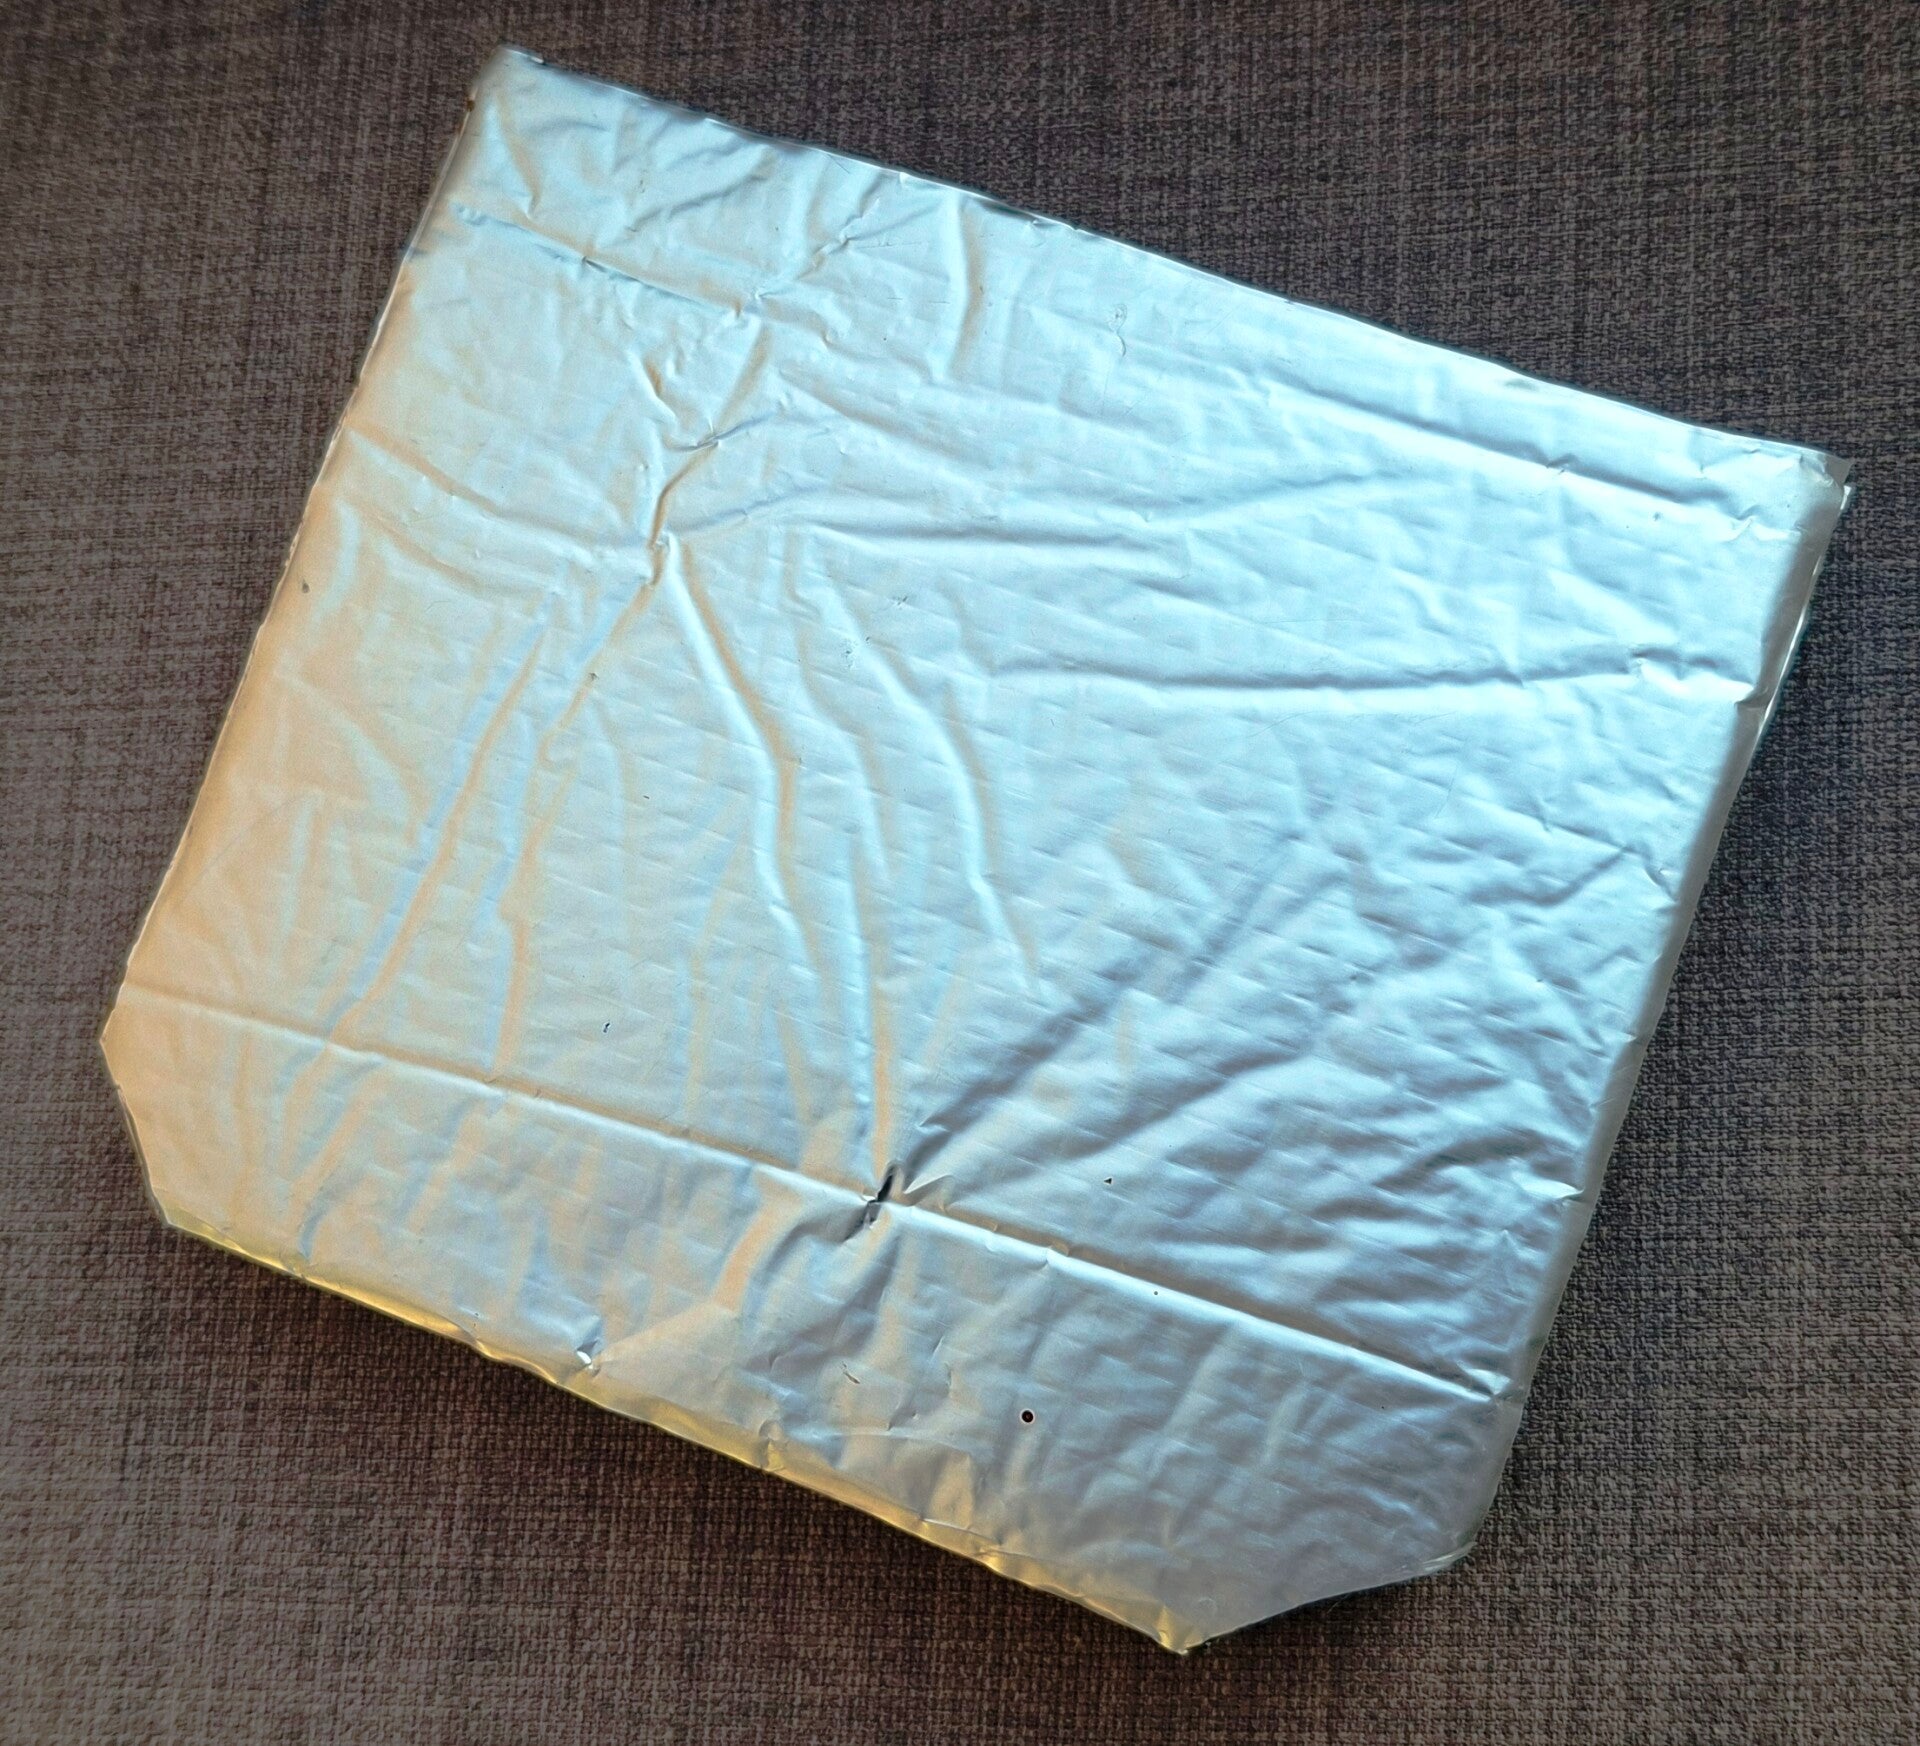
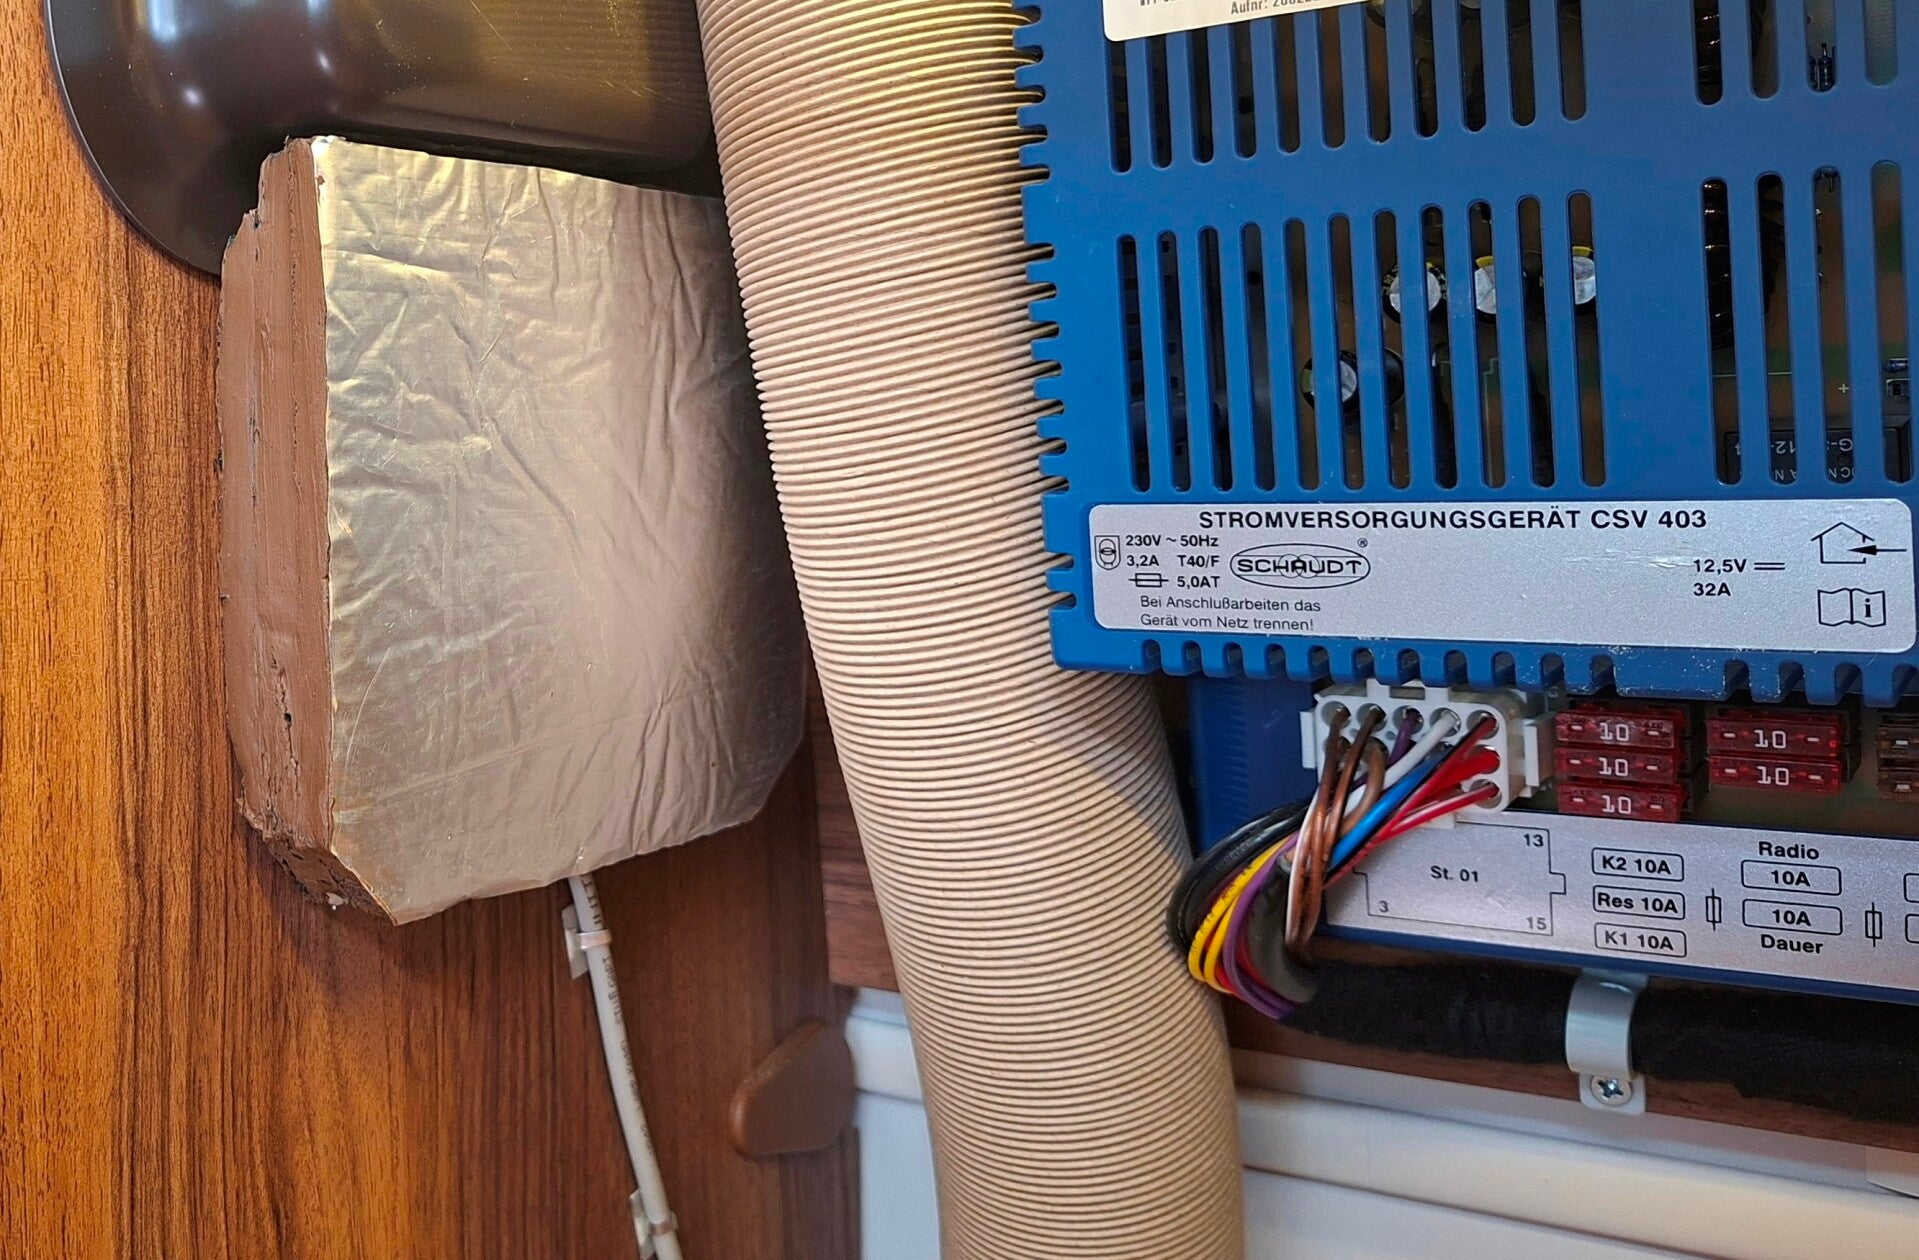
The Ultraheat is switched on and off (in every power setting) by a thermostat. This consists of a sensor in the control unit. Since we mounted this control unit in the side wall of the wardrobe without thinking, it doesn't work at all. Specifically: due to the heater, the water boiler, and the Schaudt power supply, the inside of the wardrobe gets so hot that the sensor quickly thinks 30 degrees has been reached and switches off. There is an optional separate sensor that replaces the sensor in the control unit; you can then mount this in a completely different location. However, its connection at the rear of the heater is difficult to access. So we chose to insulate the rear of the control unit well, so that only the temperature of the interior is measured and not the inside of the warm wardrobe. We use the thermal insulation material that we also used for the rear of the heater itself.
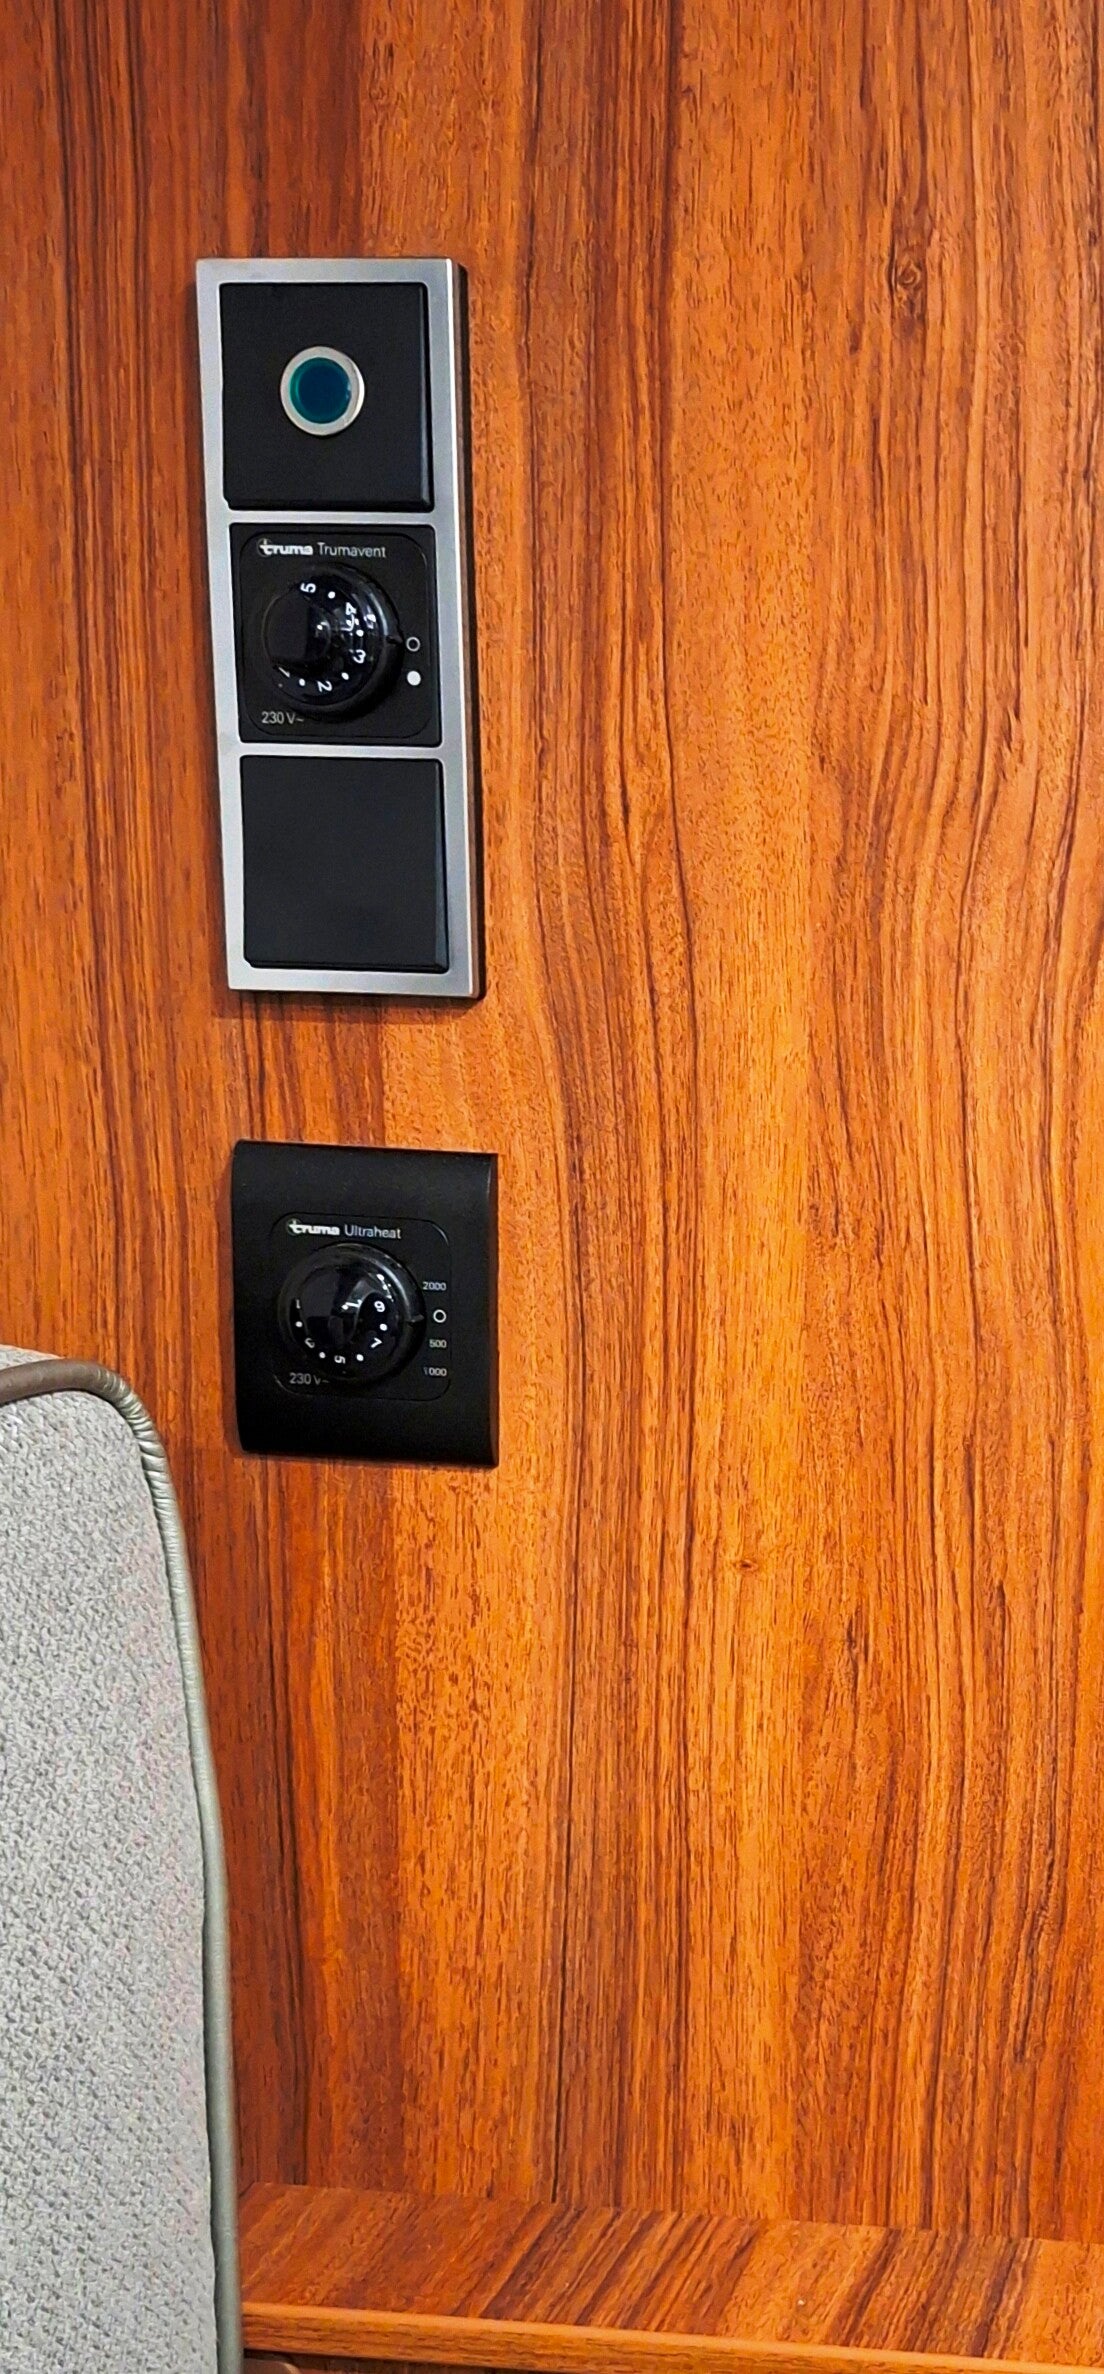
Wrong place for operating the Ultraheat...
Because the rear section is located in the cabinet next to the Schaudt power supply and above the heater and the boiler.
Comments and questions
Simon W. You are absolutely right about the poor mounting of the heater by Eriba. I replaced the top two of the six small screws with M3 screws and nuts, with a washer on the back. Then it is also firmly attached. Answer: Of course that's a good idea too Simon. Eriba should take a look at your comment :)
Gerard M. The Ultraheat's efficiency is indeed low, but if you don't turn on the ring heater, it's silent, even when combined with gas heating. That's why I'm considering installing it. But I assume the Ultraheat generates a lot of heat at 2000W? Answer: That's certainly possible, but you'd need to be at a campsite with a connection of at least 10A. Until now, we've always stayed at campsites with 6A (or less), and then the 1000W setting is definitely the maximum. Combining it with gas is an option; we were surprised that it doesn't actually use that much gas.
Ulrika S. What insulation material do you use for the back of the heater, and how do you attach it? Answer: It's self-adhesive insulation made of heat-resistant foam with an aluminum layer. (Bought from a Chinese website, but probably also available at local auto parts stores.)
Diny van M: "You're quite negative about the Truma heater. But it is the standard in many caravans. What could be an alternative?" Answer: If you want to heat with gas, I think the Truma is an excellent heater, probably the best on the market. But the Ultraheat is not the most efficient electric heater. Small ceramic heaters outperform the Truma Ultraheat in terms of efficiency, heating speed, size, weight... And oh yes: they cost less than a tenth of the price of the Ultraheat.
Maak jouw eigen website met JouwWeb