We are adding three small shelves:
1) A shelf to camouflage the ugly table rail by the bed
2) A shelf to replace the weird felt bag in the seating area
3) A small shelf on the outside of the wardrobe

We consider the Eriba bedside table (photo left) bulky, ugly, and impractical. Without that cabinet, the small seat cushion (photo right) simply stays in place permanently. So: we dismantle the cabinet and use the top for a small plant shelf 1) and a larger kitchen countertop. We also use it to make shelves 2) and 3) and a partition that protects the mover battery.

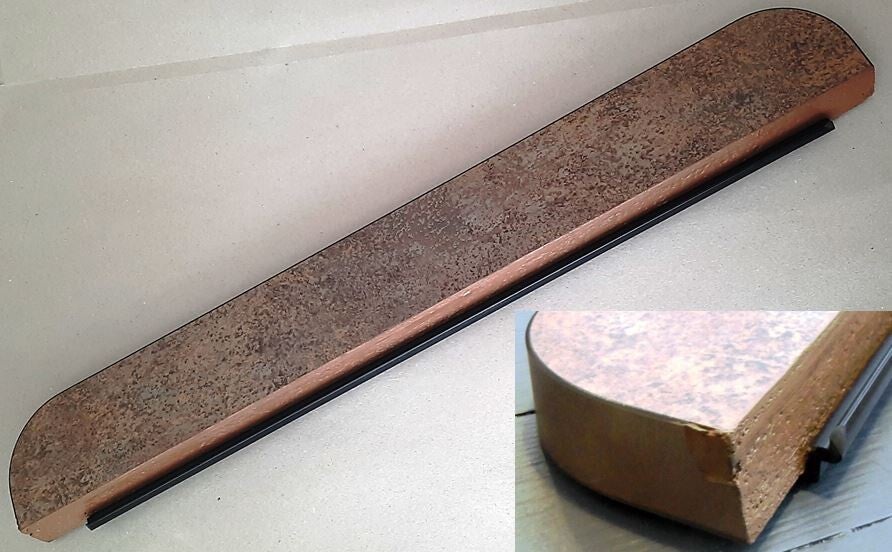
1) Small shelf at the bed. We sawed a small shelf, seven centimeters wide, out of the top of the nightstand. Enough for a glass of water without bumping your head while sleeping.
We used a fine-toothed saw because the top is made of veneered Styrofoam. Next, we sealed the Styrofoam brown and mounted the plastic strip of the nightstand (photo on the right).
We used the remaining part of the top to make the kitchen counter significantly larger. And the back panel of the cabinet will become a partition under the benches, to shield the mover battery.
Adding plants
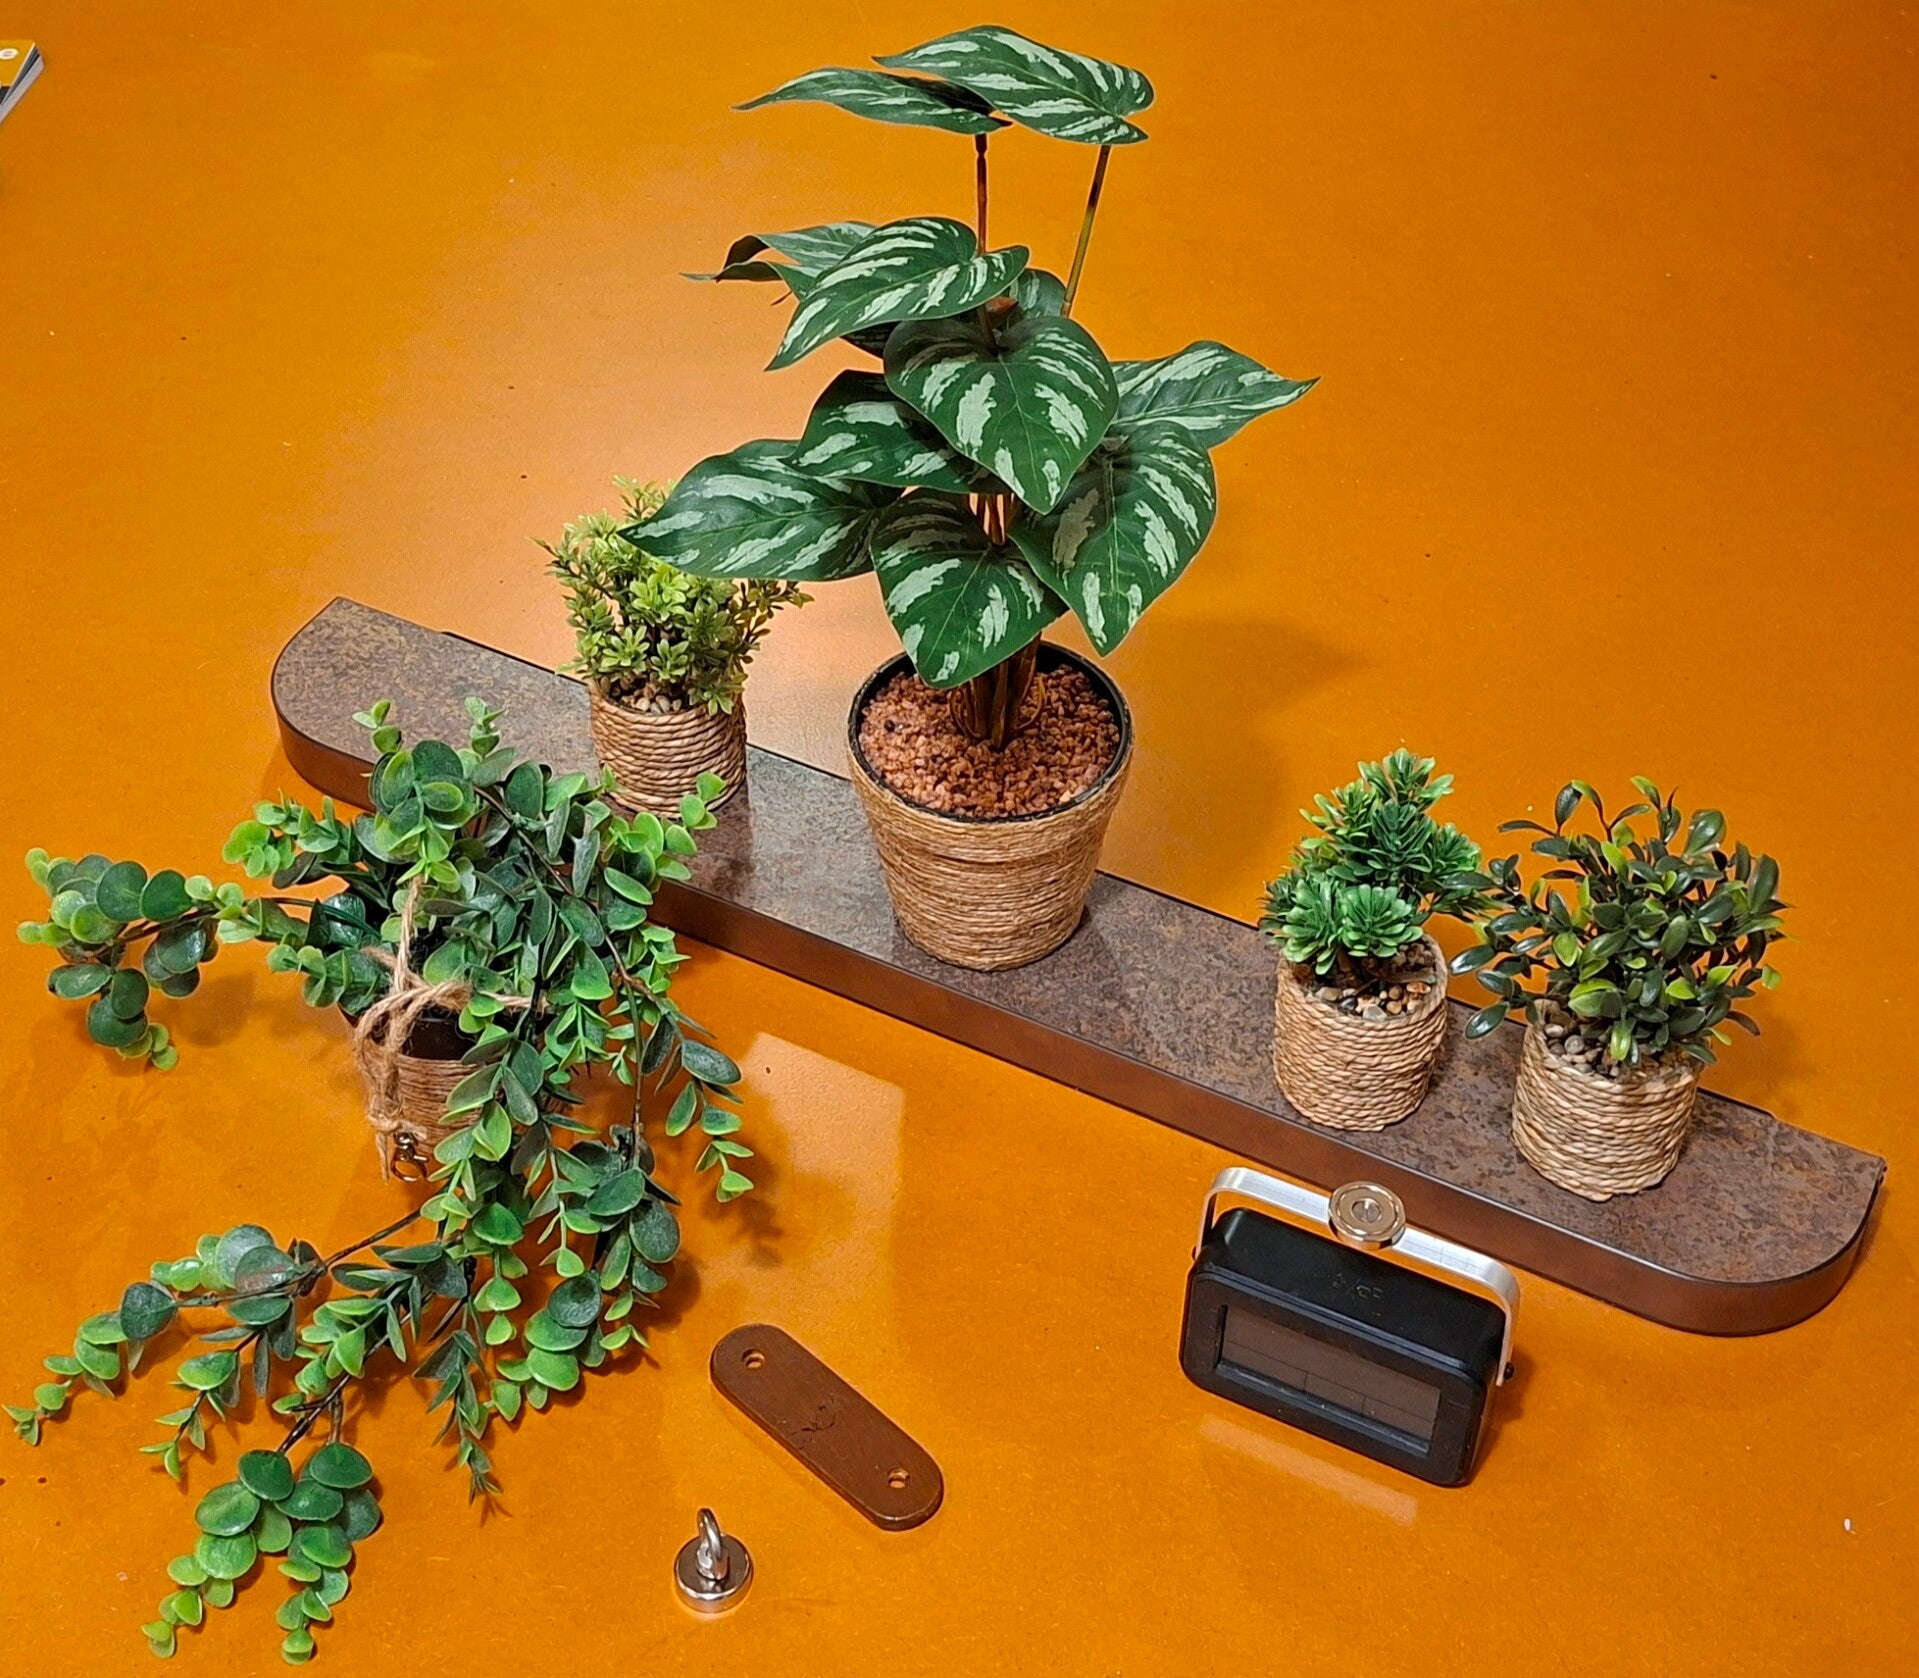
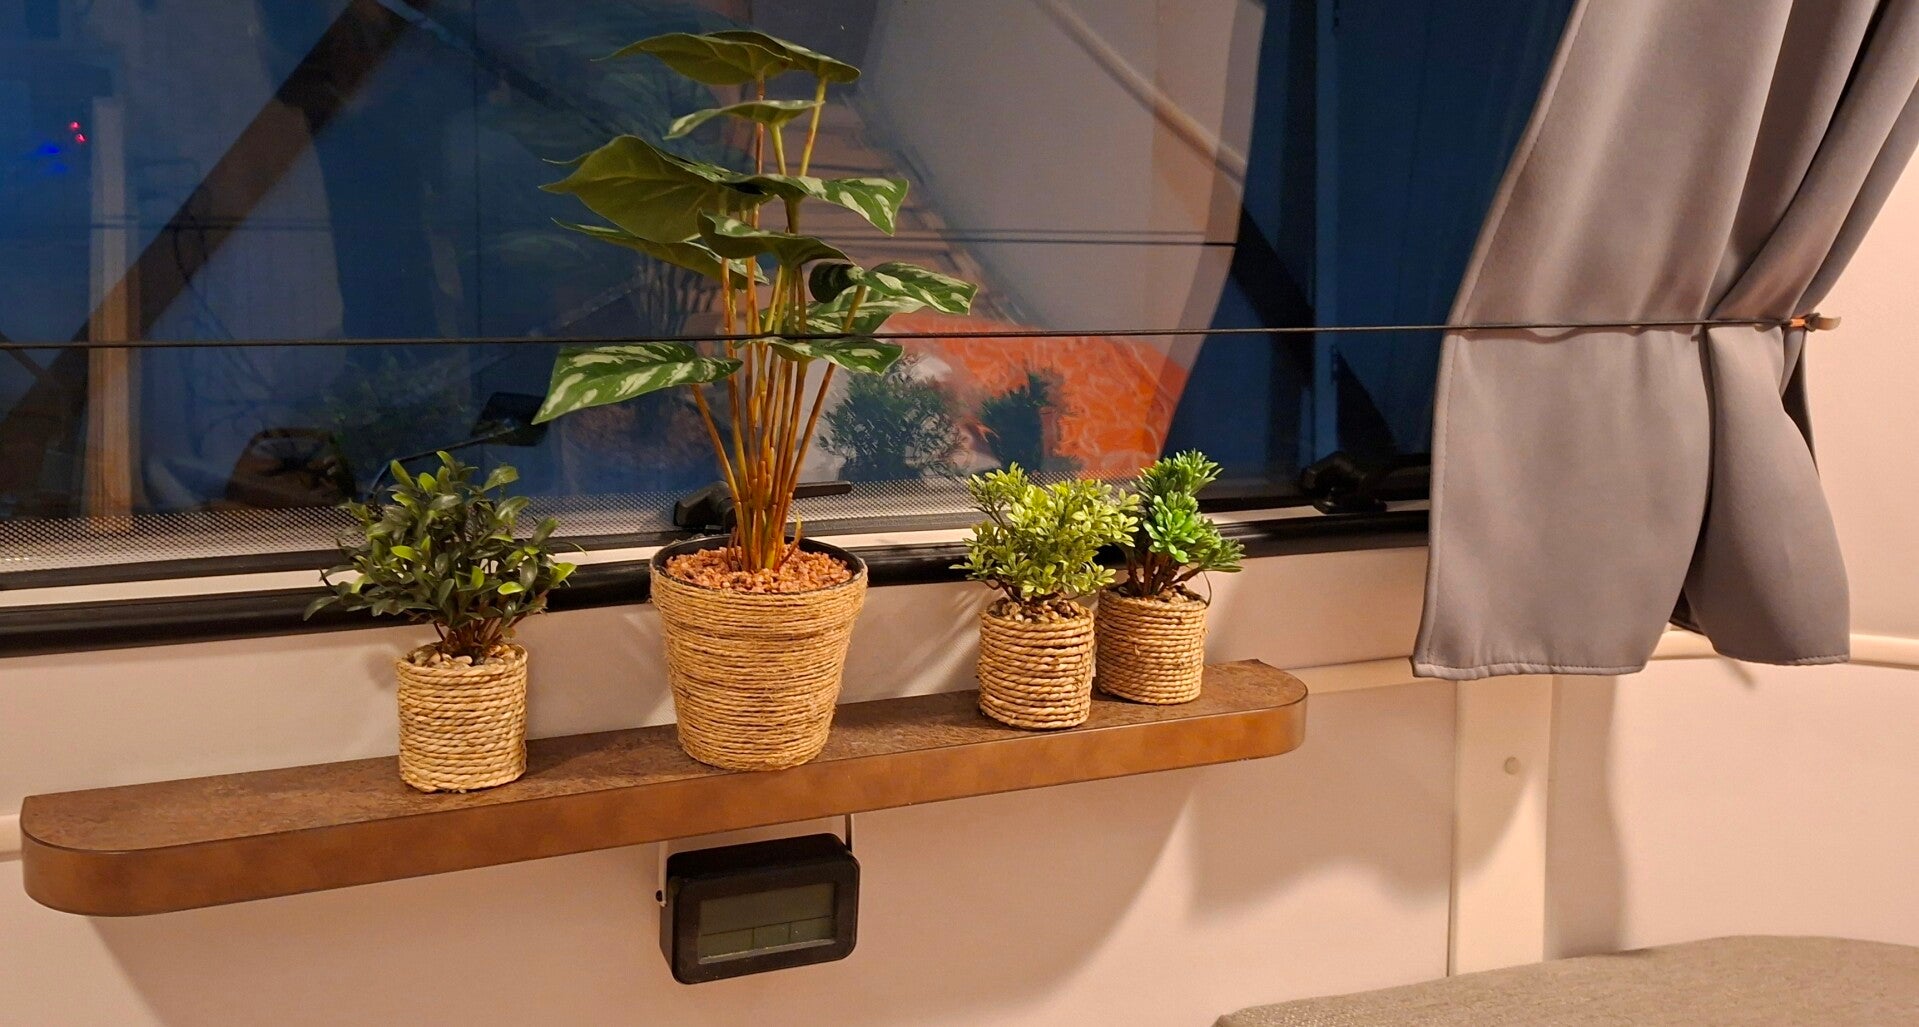
We buy a few plastic plants that still look reasonably realistic. Pots are wrapped with rope and mounted with strong magnets in the bottom. Magnets are also placed in the shelf, so that four small plant pots sit on it without falling off on the go.
While we're messing around with magnets...
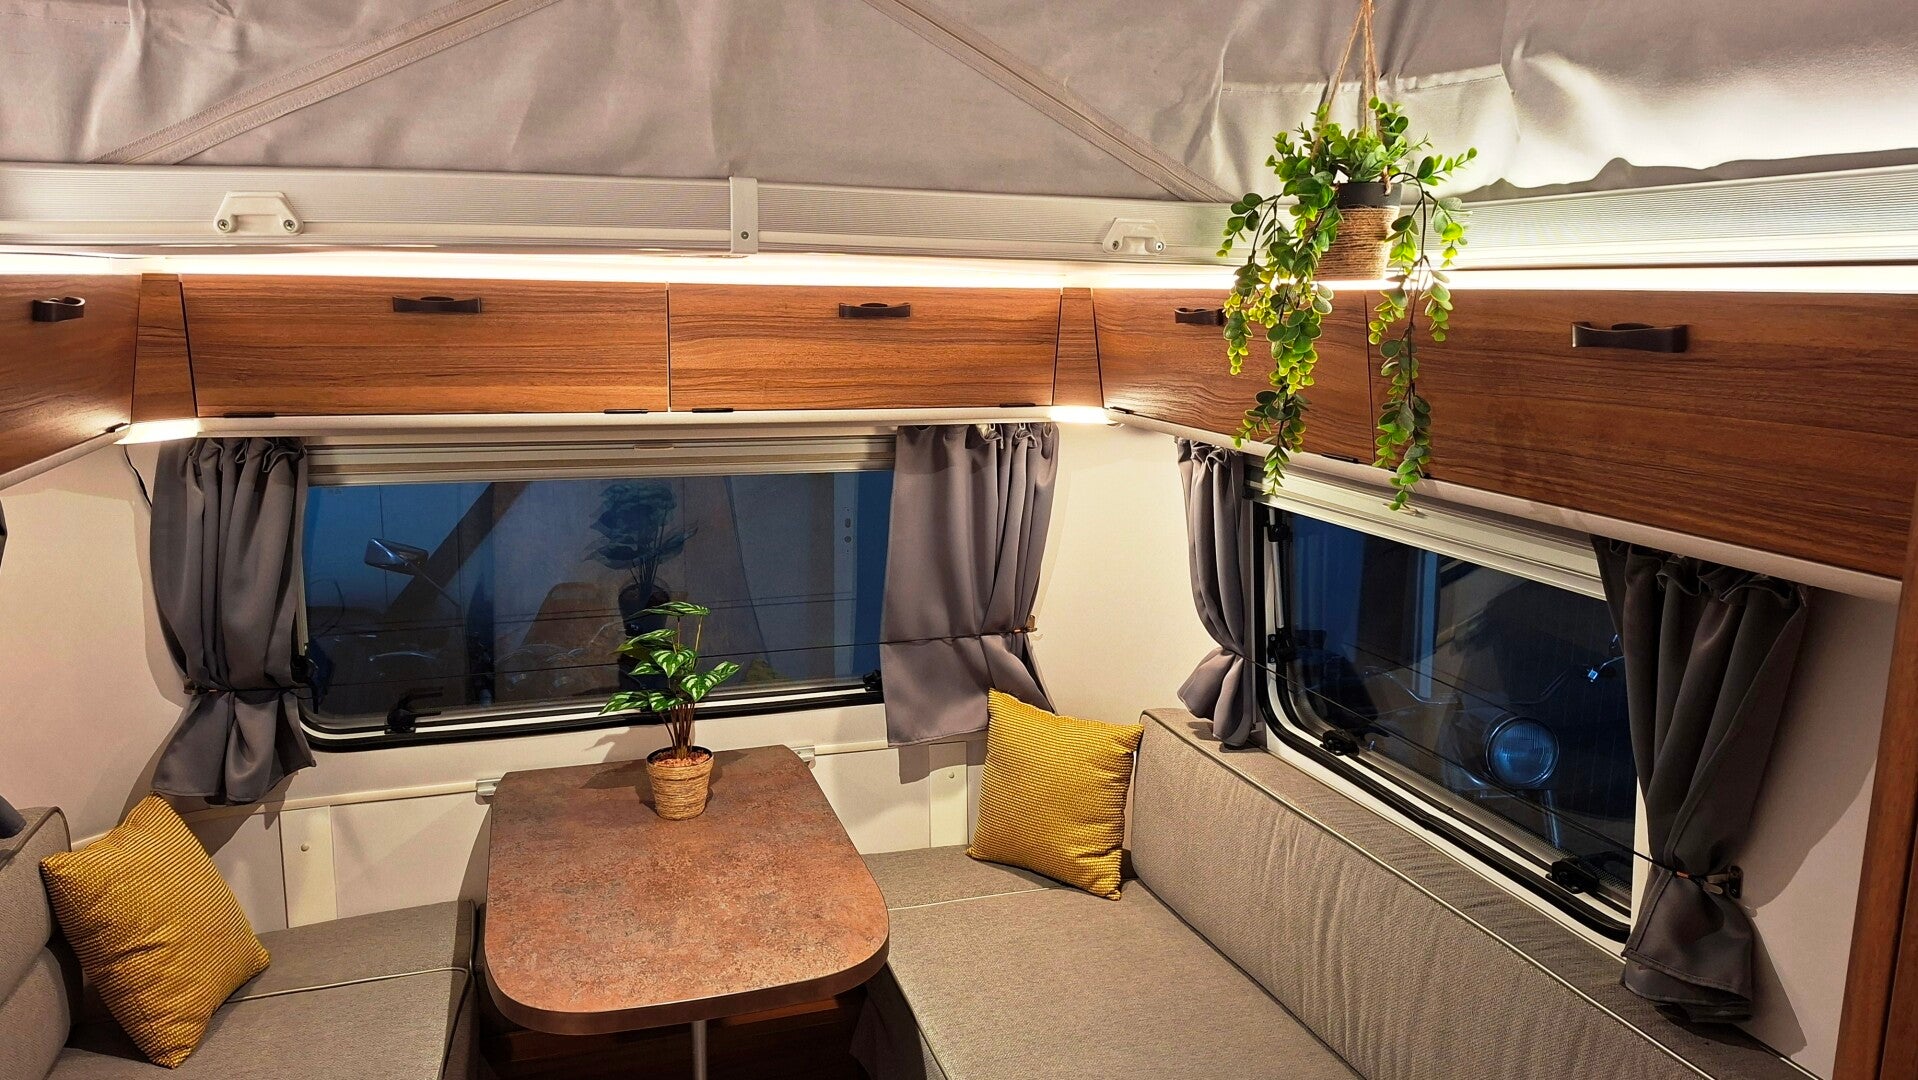
Underneath the smoke detector we removed, there are two ugly screw holes in the pop-up roof. We screw an oval piece of wood containing a magnet into that spot. A hanging plant fits from a magnetic hook. (Hanging plant and materials used in the bottom left of the photo.)
And we mount a small bracket with a magnet on a DCF battery clock, so that it can be fitted hanging (rotatably) under the shelf or stand on top of it.
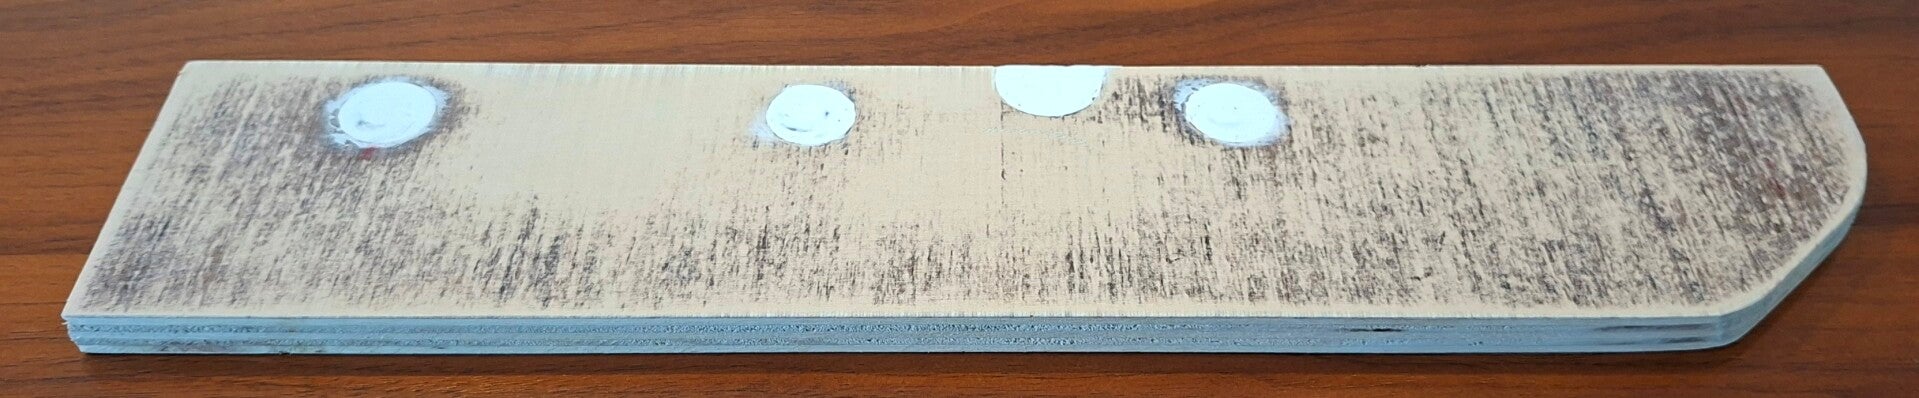
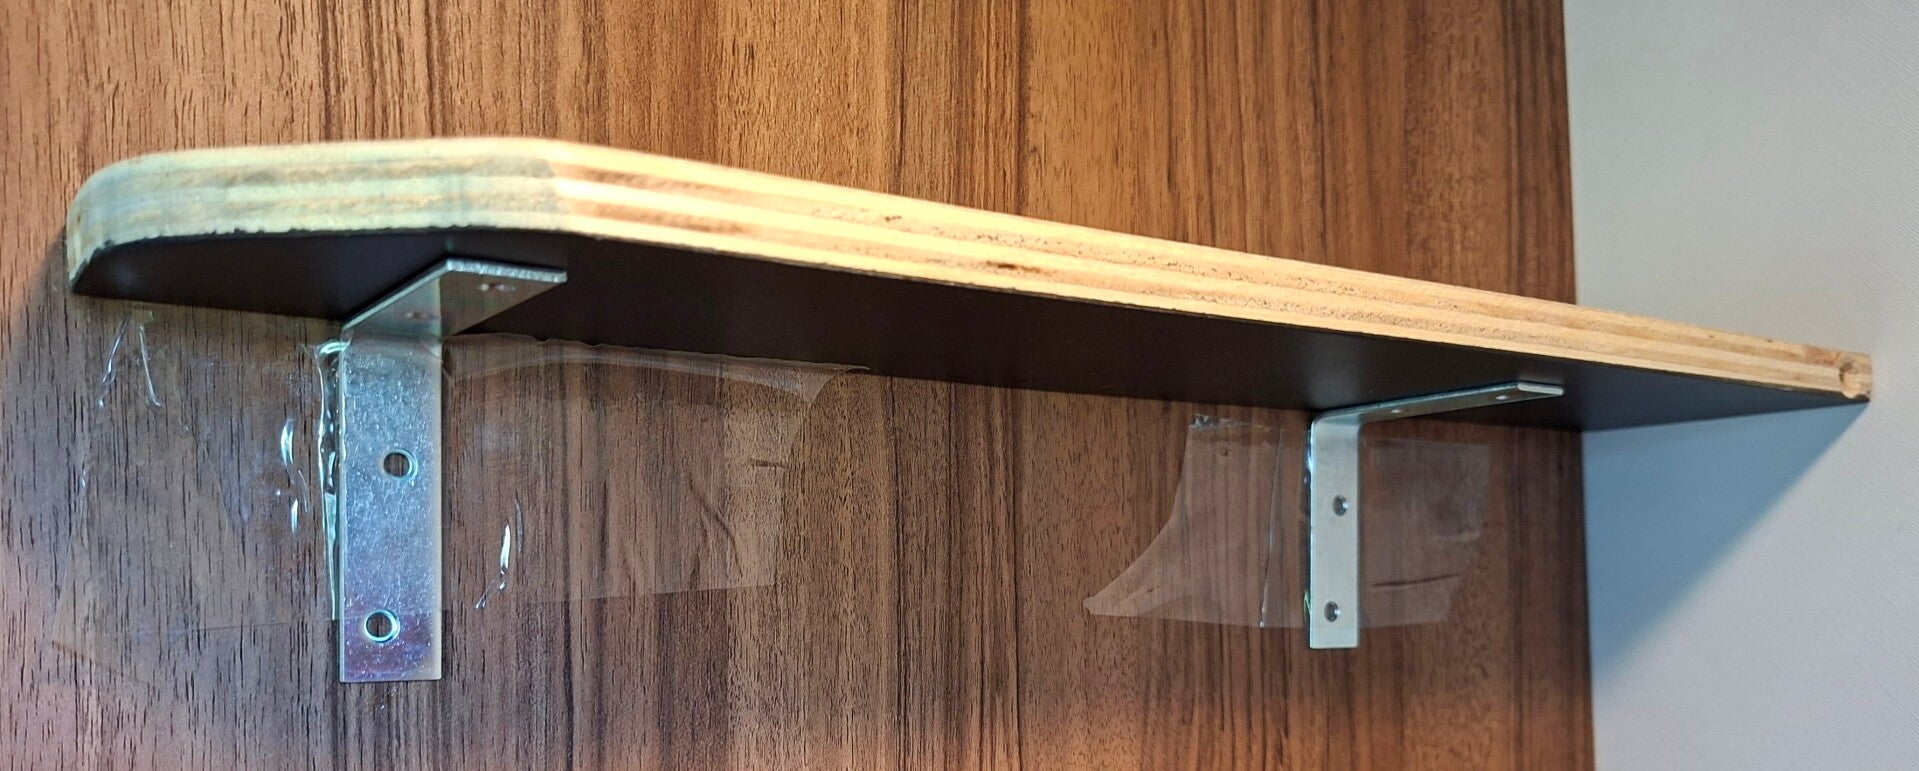
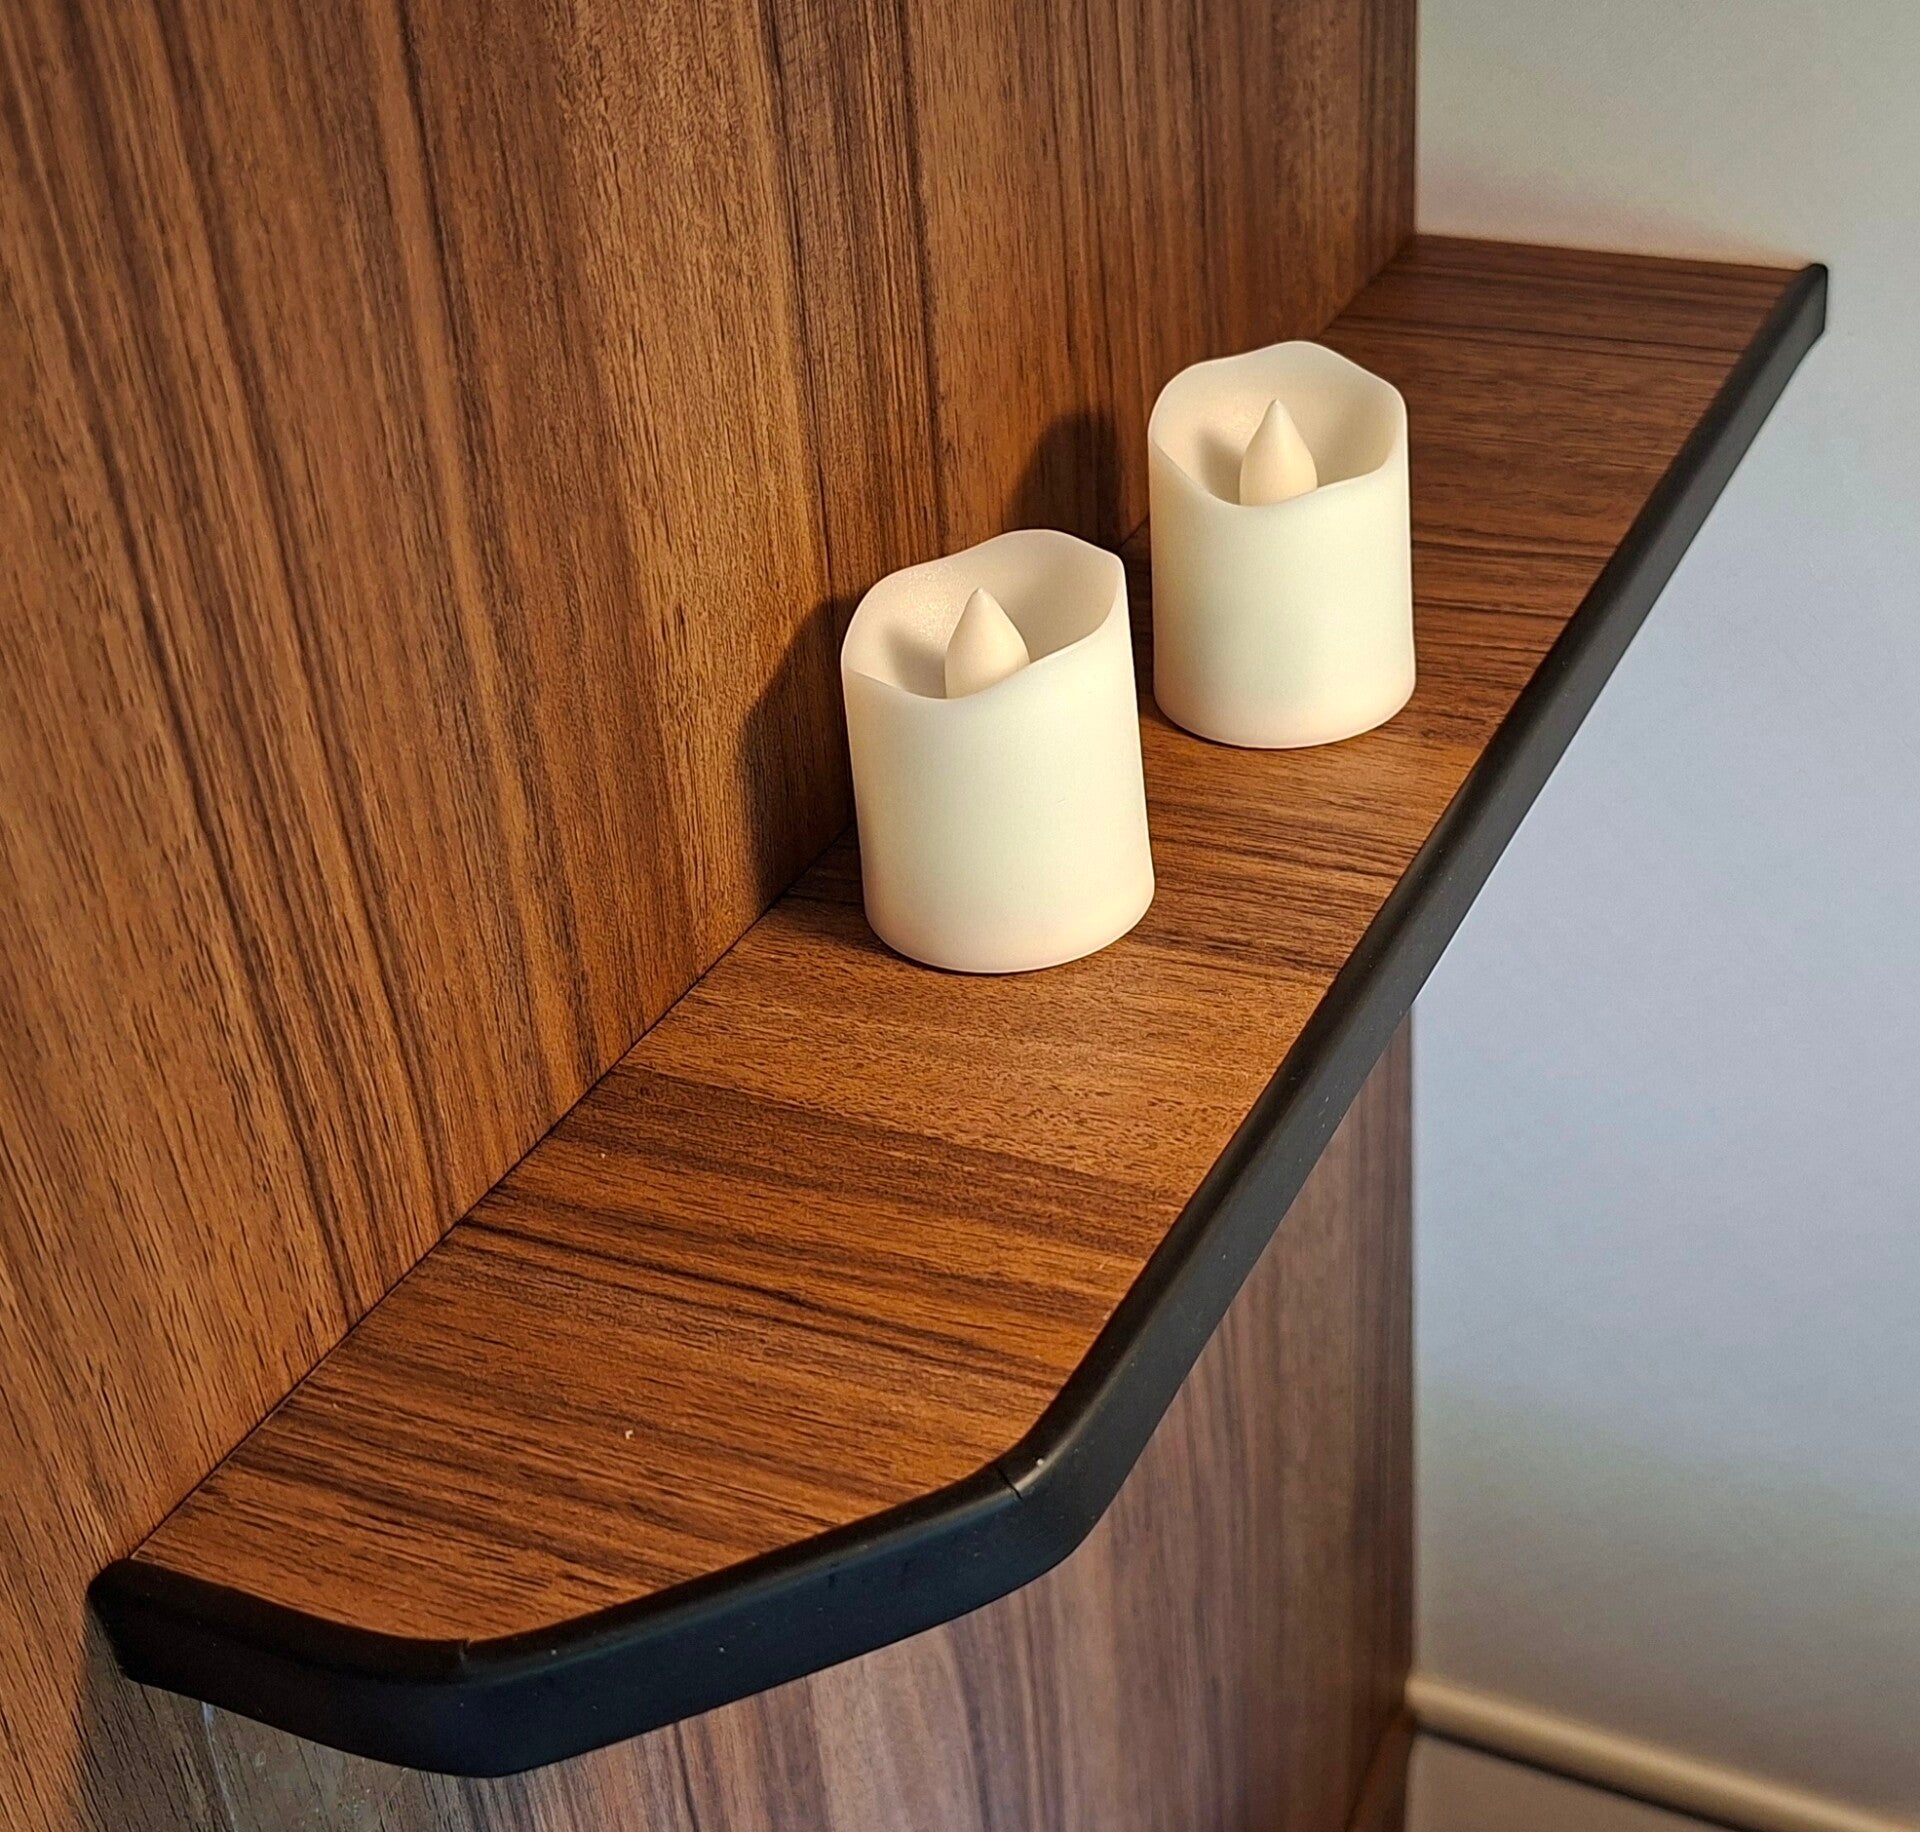
2) Small shelf by the seating area. The felt bag is removed. The new shelf covers the old screw holes. We attach three magnets to the underside of this shelf to hang hooks underneath. Fill and sand. We spray the underside black. It is secured with short (!) dowels and small screws at the corners. (Angle brackets in the photo only to keep it square while the glue dries.) As soon as the screws in the corners are countersunk, the self-adhesive rubber profile can be bent around the edge.

On the right are the temporary angle brackets. Also visible are holes in the corners for the two fixing screws. On the far right is the final result.
3) Shelf next to wardrobe. In the same way, we make a small shelf on the side of the wardrobe, so at the foot of the bed. For this, too, we use a piece of veneered wood left over from the ex "nightstand". Because there is enough space there, that shelf can be ten centimeters or more wide, as desired. After fitting we'll add the same rubber profile.

Maak jouw eigen website met JouwWeb