A quick note: this topic is strictly for experienced and/or confident DIYers. You certainly don’t want a storage box breaking loose from underneath your caravan and flying through the windshield of another road user’s vehicle. Safety first.
Since the A-frame locker (gas locker) is small and the external service hatch fills up quickly with loose items, there is plenty of space underneath the caravan floor to create additional storage compartments. Because the floor sits on top of the chassis frame, you can tuck storage boxes in there that remain completely hidden from the outside. We are creating three types of storage compartments under the caravan. After a few necessary warnings regarding the floor construction, we will present them in order of how easy they are to replicate:
1) Removable plastic "Euro-style" crates—perfect for items like power cables and toilet chemicals;
2) A long, hinged, shallow box designed for tent poles (including "anti-sag" roof poles);
3) A hinged pull-out drawer for guy lines.
The floor. First of all: what does the Eriba floor look like? The sandwich-construction floor rests on a frame made of steel beams. This floor is 42 millimeters thick in total and consists primarily of XPS rigid foam insulation. (XPS does not absorb water and is resistant to mold and microorganisms.) This means you cannot simply screw anything you like into the underside! Therefore, only undertake such modifications if you are absolutely certain of what you are doing and know exactly where and how to apply specific fasteners.

In short, the bottom coated layer is not suitable for screw fixings, the XPS intermediate layer is even less so. For a long wood screw, only the top layer (approximately 9 mm thick) provides any real grip. When combined with a polymer sealant, it is possible to attach items, provided they are not subject to heavy loads. (Always seal any screw holes on the underside of the caravan floor with a reliable sealant to protect against moisture and water ingress!)
A stronger and more reliable method is to drill all the way through the floor and insert long M4 bolts from the top (inside the caravan), securing them with large washers. While this will be visible from above, it shouldn't be an issue if the bolts are located under the bench seats, out of sight in the main living area.
Furthermore, the underside features a chassis made of coated steel. The ends have been rather untidily finished with a Tixophalte-style sealant. (It is likely that Eriba manually narrows a standard Knott chassis to fit?) The outer edge of the caravan floor is finished with a decorative trim that extends about five centimeters below the floor itself. This is precisely why it is possible to add extra storage compartments that remain virtually invisible.
1) Removable plastic containers. The plan is to have removable containers beneath the caravan at three different locations. We have opted for standard Euro-standard stacking containers measuring 400 x 300 mm. We are using the 70 mm high version, though a 100 mm high option is also available. Given the space available beneath the floor (between the chassis) the mounting system will be attached to the short sides of the containers. A layer of foam at the top edge ensures a splash-proof seal against the underside of the floor.
To mount the container underneath the caravan, we create a suspension profile for one end (shown in black in the photo) and an aluminum L-profile fitted with three spring-loaded latches for the other side.


There are many mounting holes. These are mainly used in locations where we cannot pass M4 bolts all the way through the floor (for example, under the bathroom). In such cases, we use screws of a specific length that reach exactly into the top wood layer of the floor, combined with a polymer adhesive.
Here is one example of the final result: the storage bin located near the service hatch. We use it to store an extra extension cord that we rarely need.
The bin is securely anchored in place by three spring-loaded latches. Should one of them fail, the bin will still remain in position.


2) A container for the tent poles.

At the rear, underneath the floor of the Eriba, there is a compartment measuring 112 cm in length and over 45 cm in depth. This is the compartment shown at the front in the photo.


Cut the containers into sections and join them using aluminum strips and profiles. We use stainless steel screws and locking nuts.


On the left, the underside of the box featuring reinforcements, with a U-profile along the front. On the right, reinforcement using small pieces of aluminium strip at the spot where the long piano hinge will later be attached.

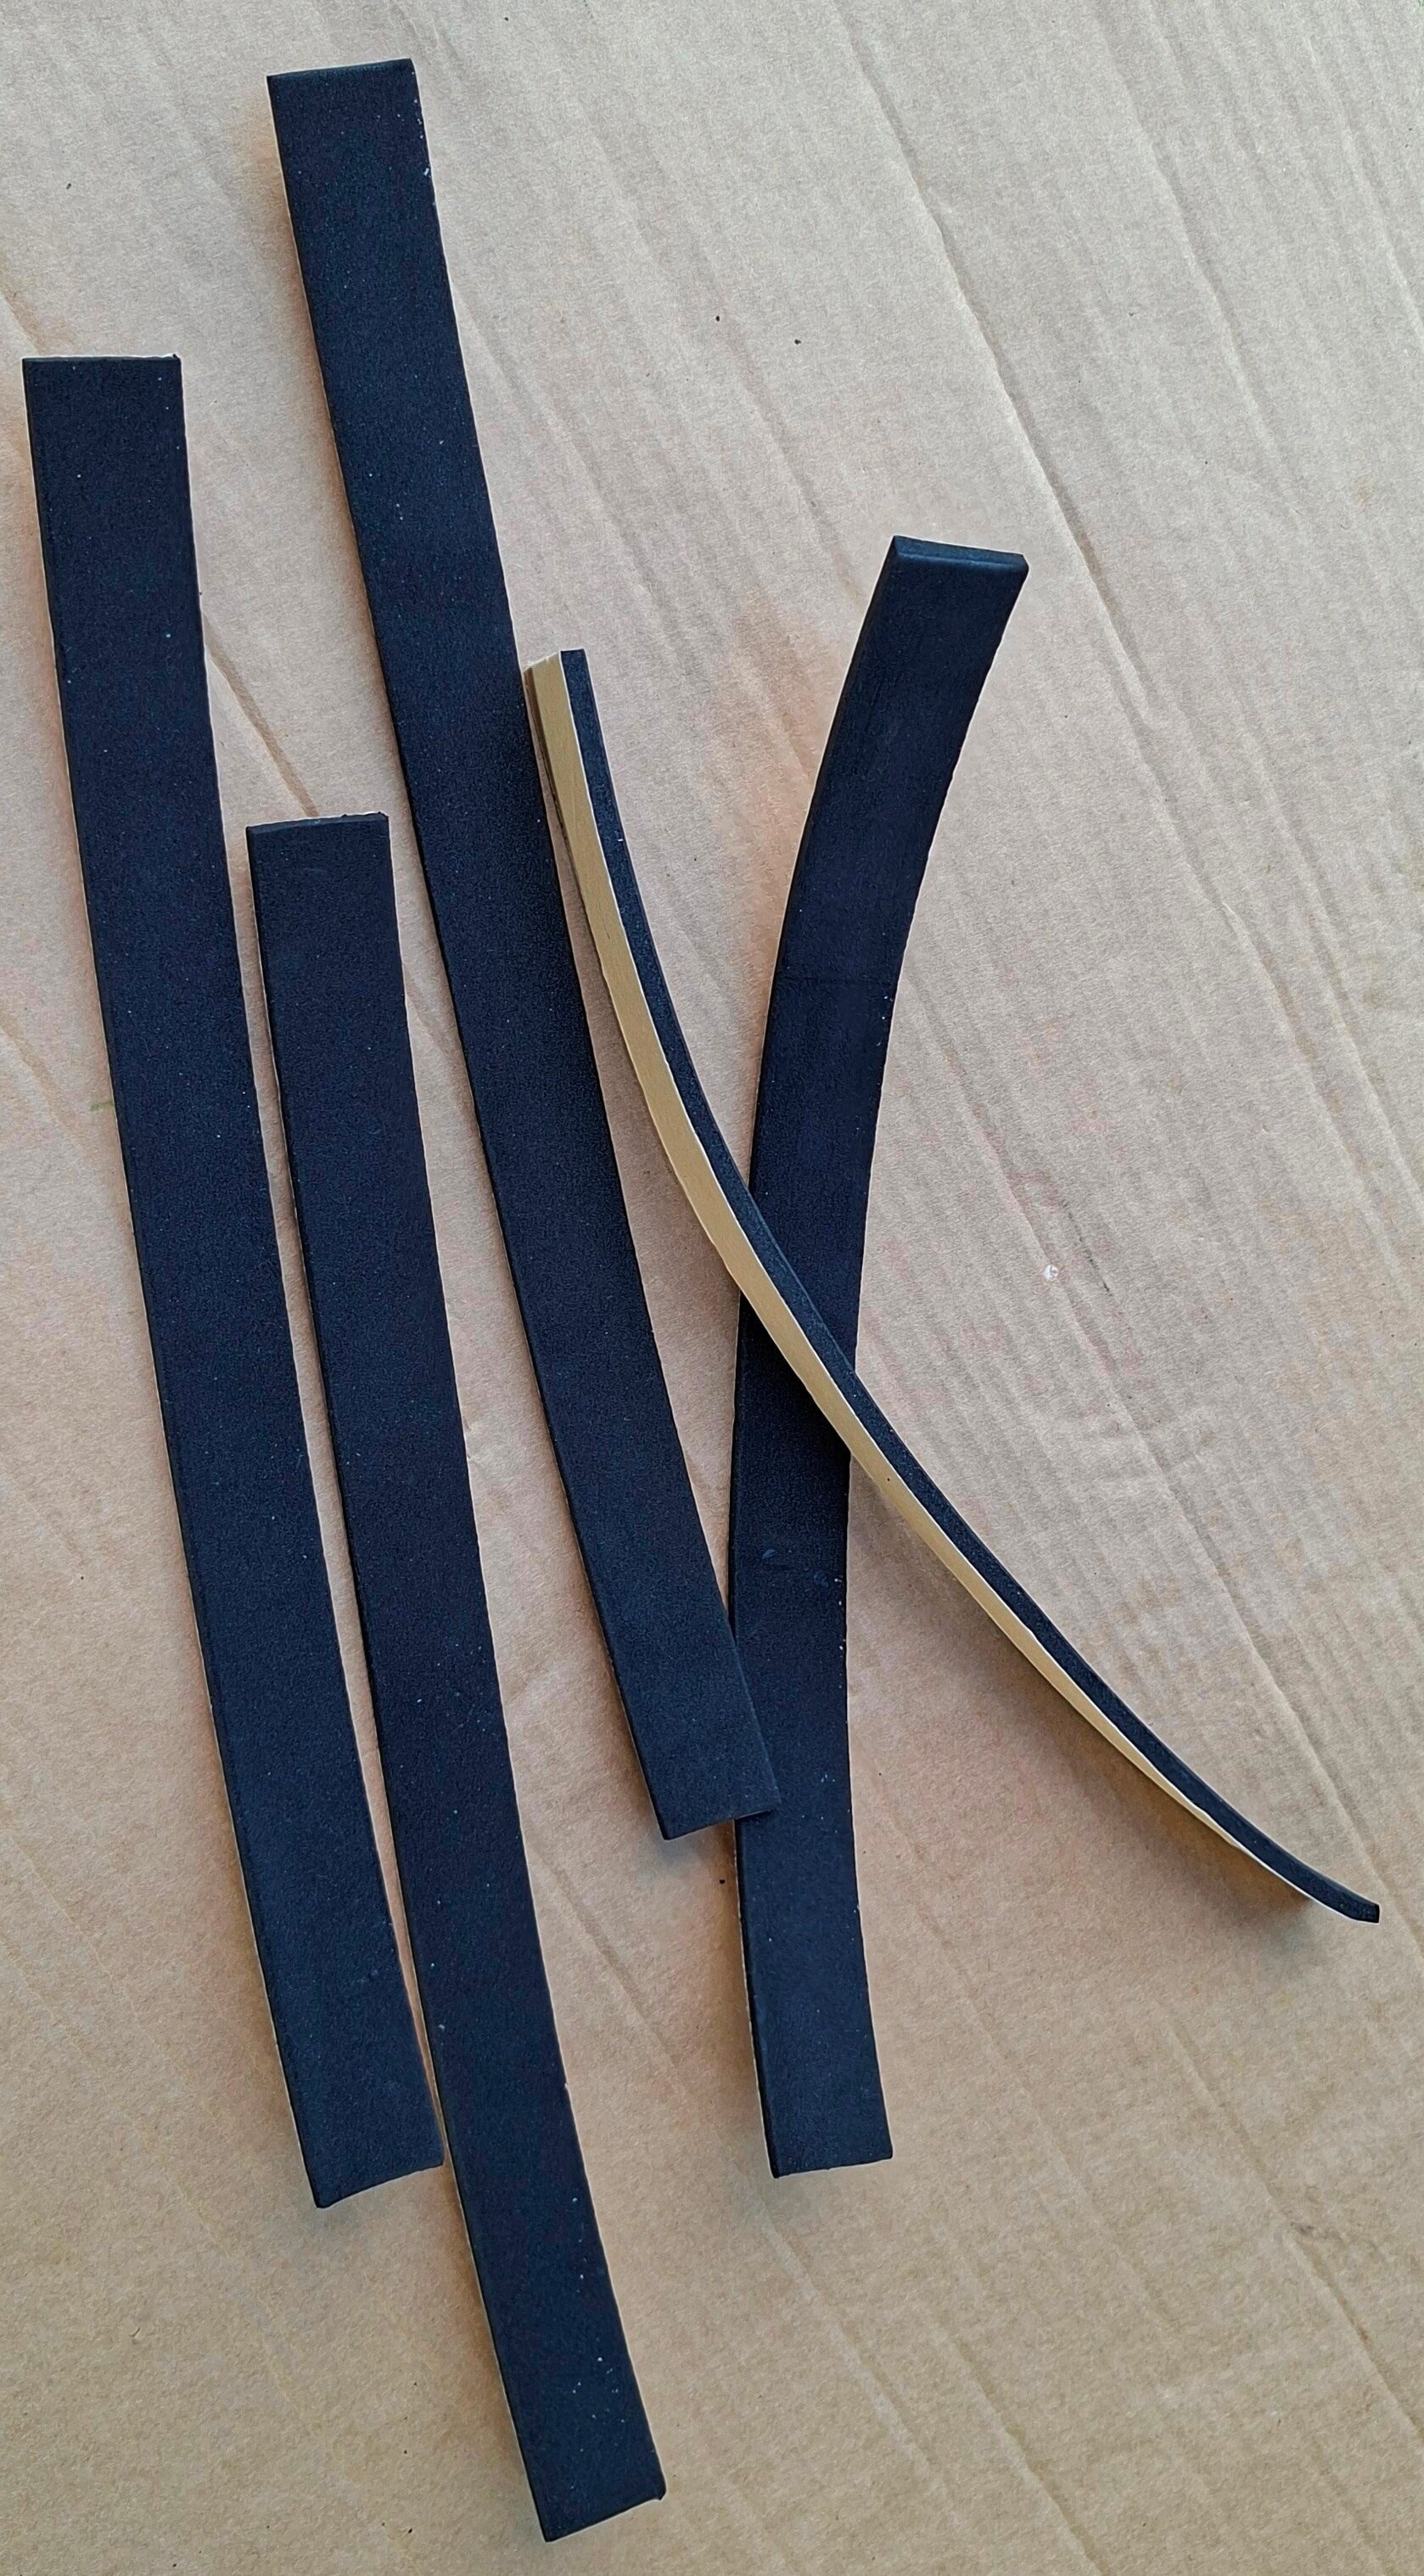
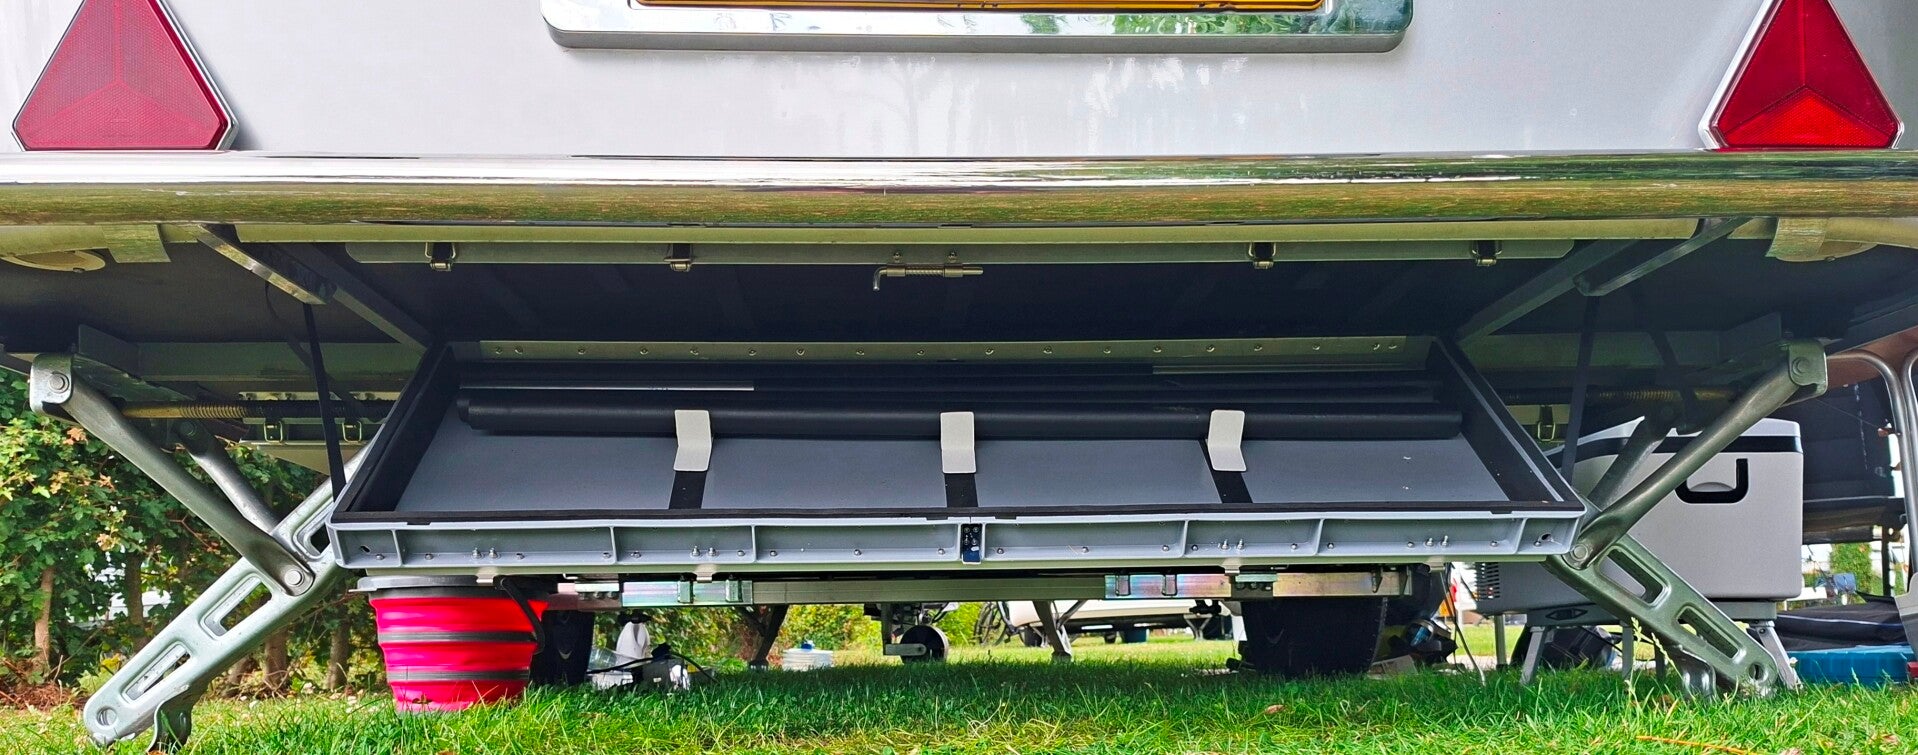
Below is the container for the tent poles, with a stainless steel piano hinge at the rear. On the bottom three self-adhesive Velcro strips to which 'dividers' can later be attached; these also conceal the M3 screws used for the reinforcements. On the left and right sides, there is sturdy foam to cushion the poles should they shift while navigating curves. Additionally, a narrow strip of firm foam runs along the entire top edge, designed to rest against the floor of the caravan.


Below the L-profile that will serve as a closure. On the right are the 'dividers' with Velcro, designed to keep the tent poles in place.


The L-profile can be mounted using M4 screws (stainless steel versions with very low-profile hex-socket heads) and nuts that pass through the floor (with large washers on the top side). The mounting holes are positioned so that their tops align precisely with the cable channel at the rear of the caravan. (So, be sure to move any wiring aside before drilling...)
The storage box itself can only be secured through the floor at its ends: the sections located directly beneath the bench seats on either side. After all, we don’t want any visible screw heads in the caravan floor in the space between the benches. To provide a rigid bridge between the benches, we are installing an additional aluminum L-profile beneath the stainless steel piano hinge. (For 'Touring' models equipped with a fixed bed, this is not relevant.) In the photo, the six holes that align with the bench seats are marked in blue; these holes pass all the way through the floor. (The holes marked in red were considered but ultimately discarded.) For the unmarked holes, we will use stainless steel wood screws, driven 41 mm deep into the floor. Everything will be sealed to be watertight.

The tent poles inside the container will be held firmly in place using Velcro dividers. However, you also want to prevent them from bouncing against the floor of the caravan (or its protective coating) while on the move. For this reason, we are also attaching sturdy foam strips to the floor itself. (At the back of the container, we will place our "anti-leakage" poles, which are soft already. See: Solving leakage)
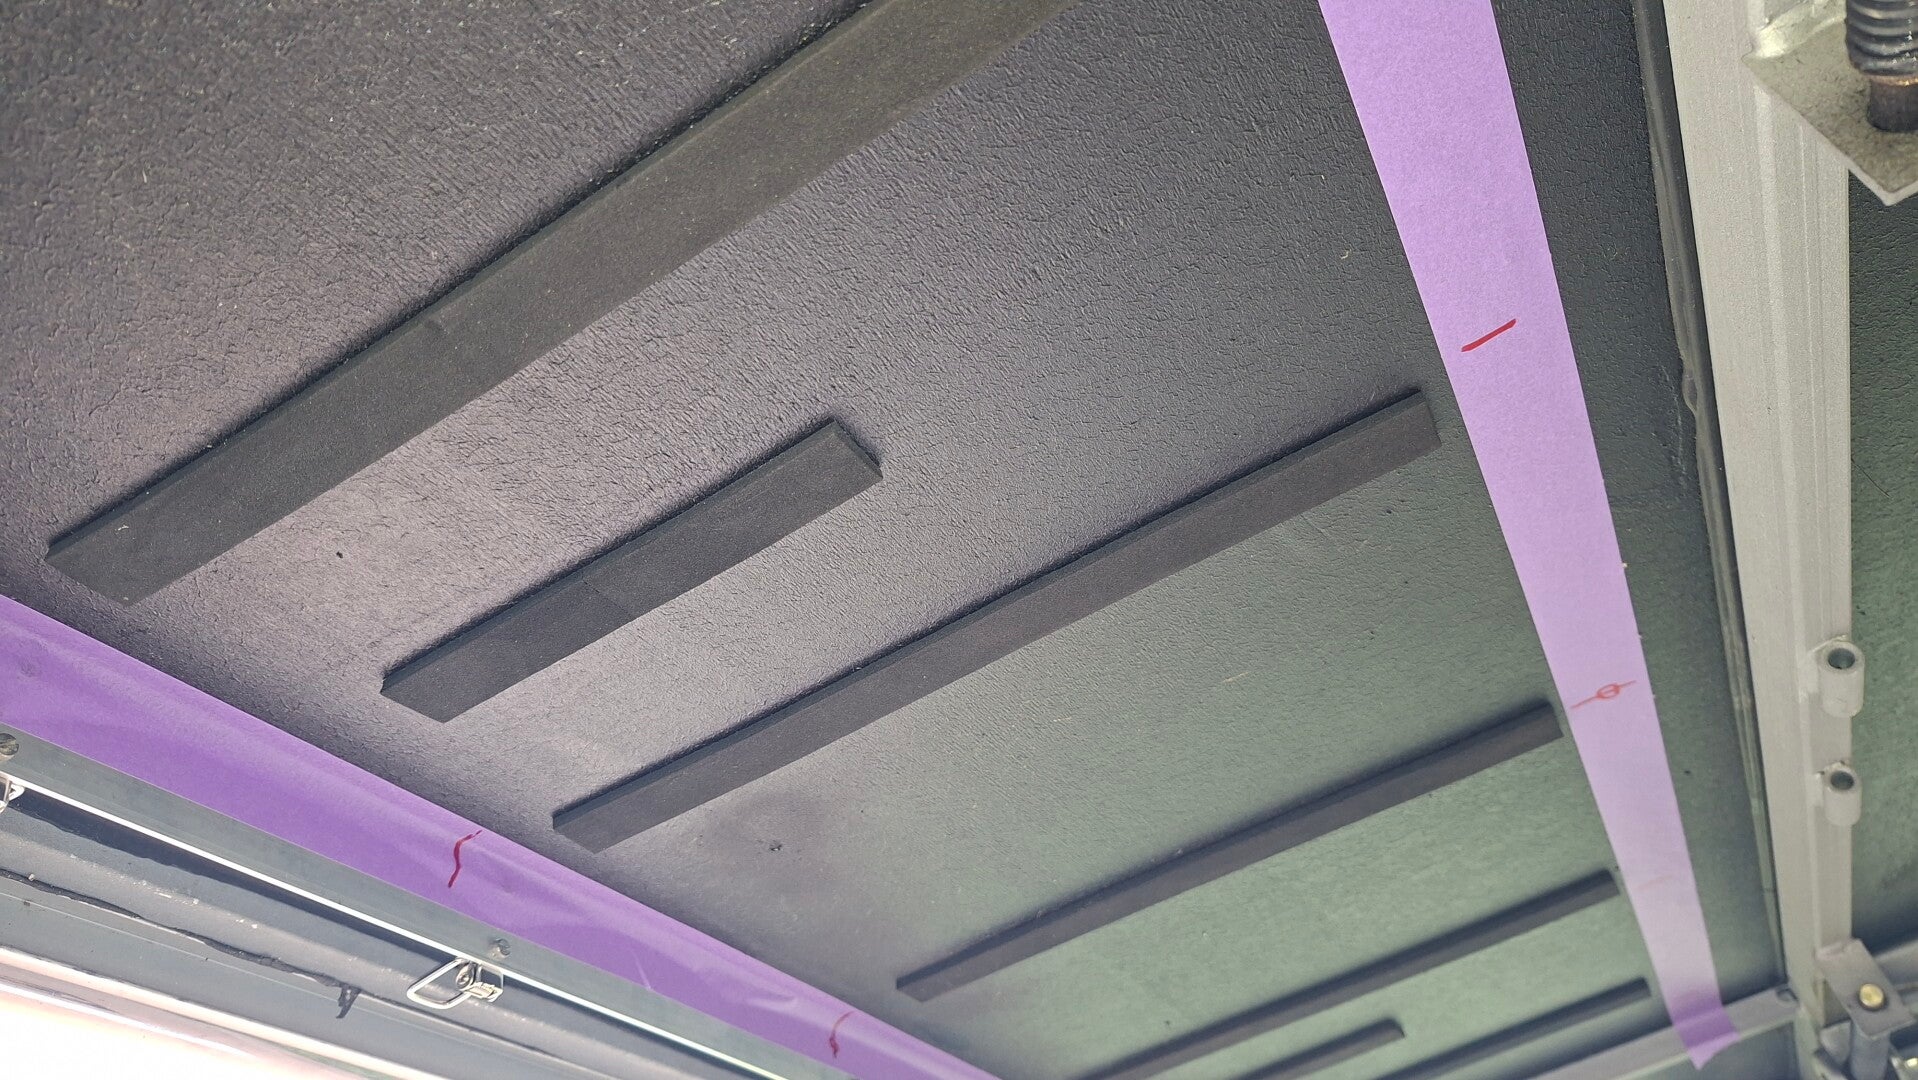
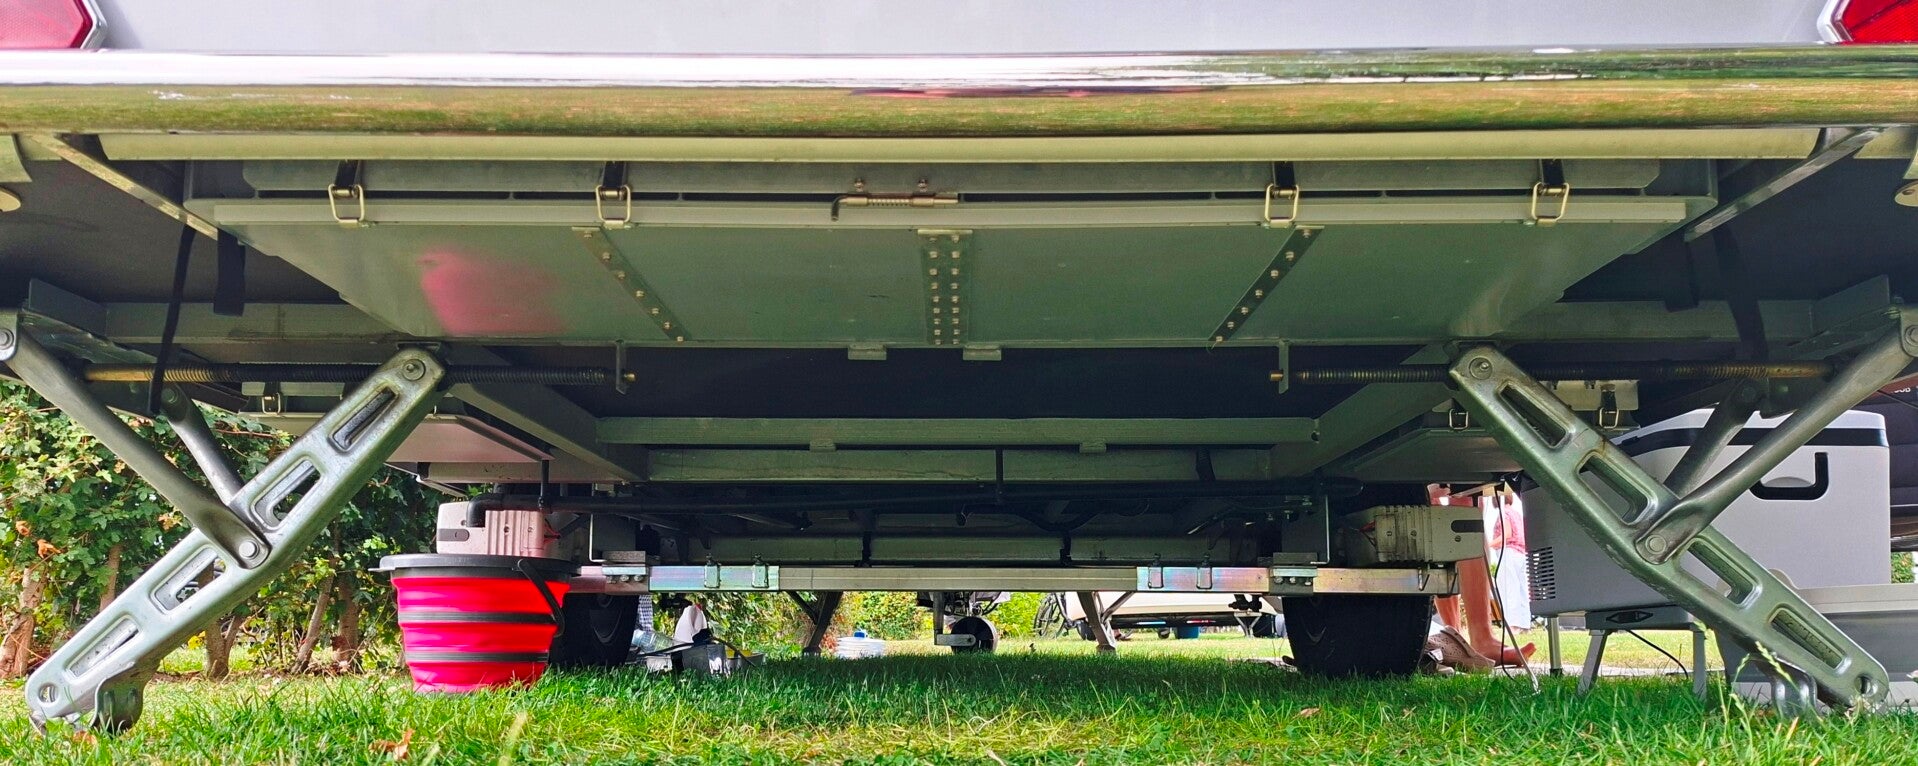
Final result. Here you can see the tent-pole container, both open and closed. The white, Velcro-backed dividers hold exceptionally well, ensuring the poles to stay securely in place within the container. In the photo, the container is only half-full; as we continue our travels, the poles for the awning will be added, along with additional dividers. In practice, it’s wonderful to always have the poles quickly at hand. When stowed away, the container itself is completely out of sight.
3) A drawer for guy lines.
We are using an IKEA oven dish, measuring 400 x 320 mm. This stainless steel container will be mounted within a hinged aluminum frame, which is to be screwed onto the underside of the caravan floor. The goal: to keep all guy lines easily accessible.


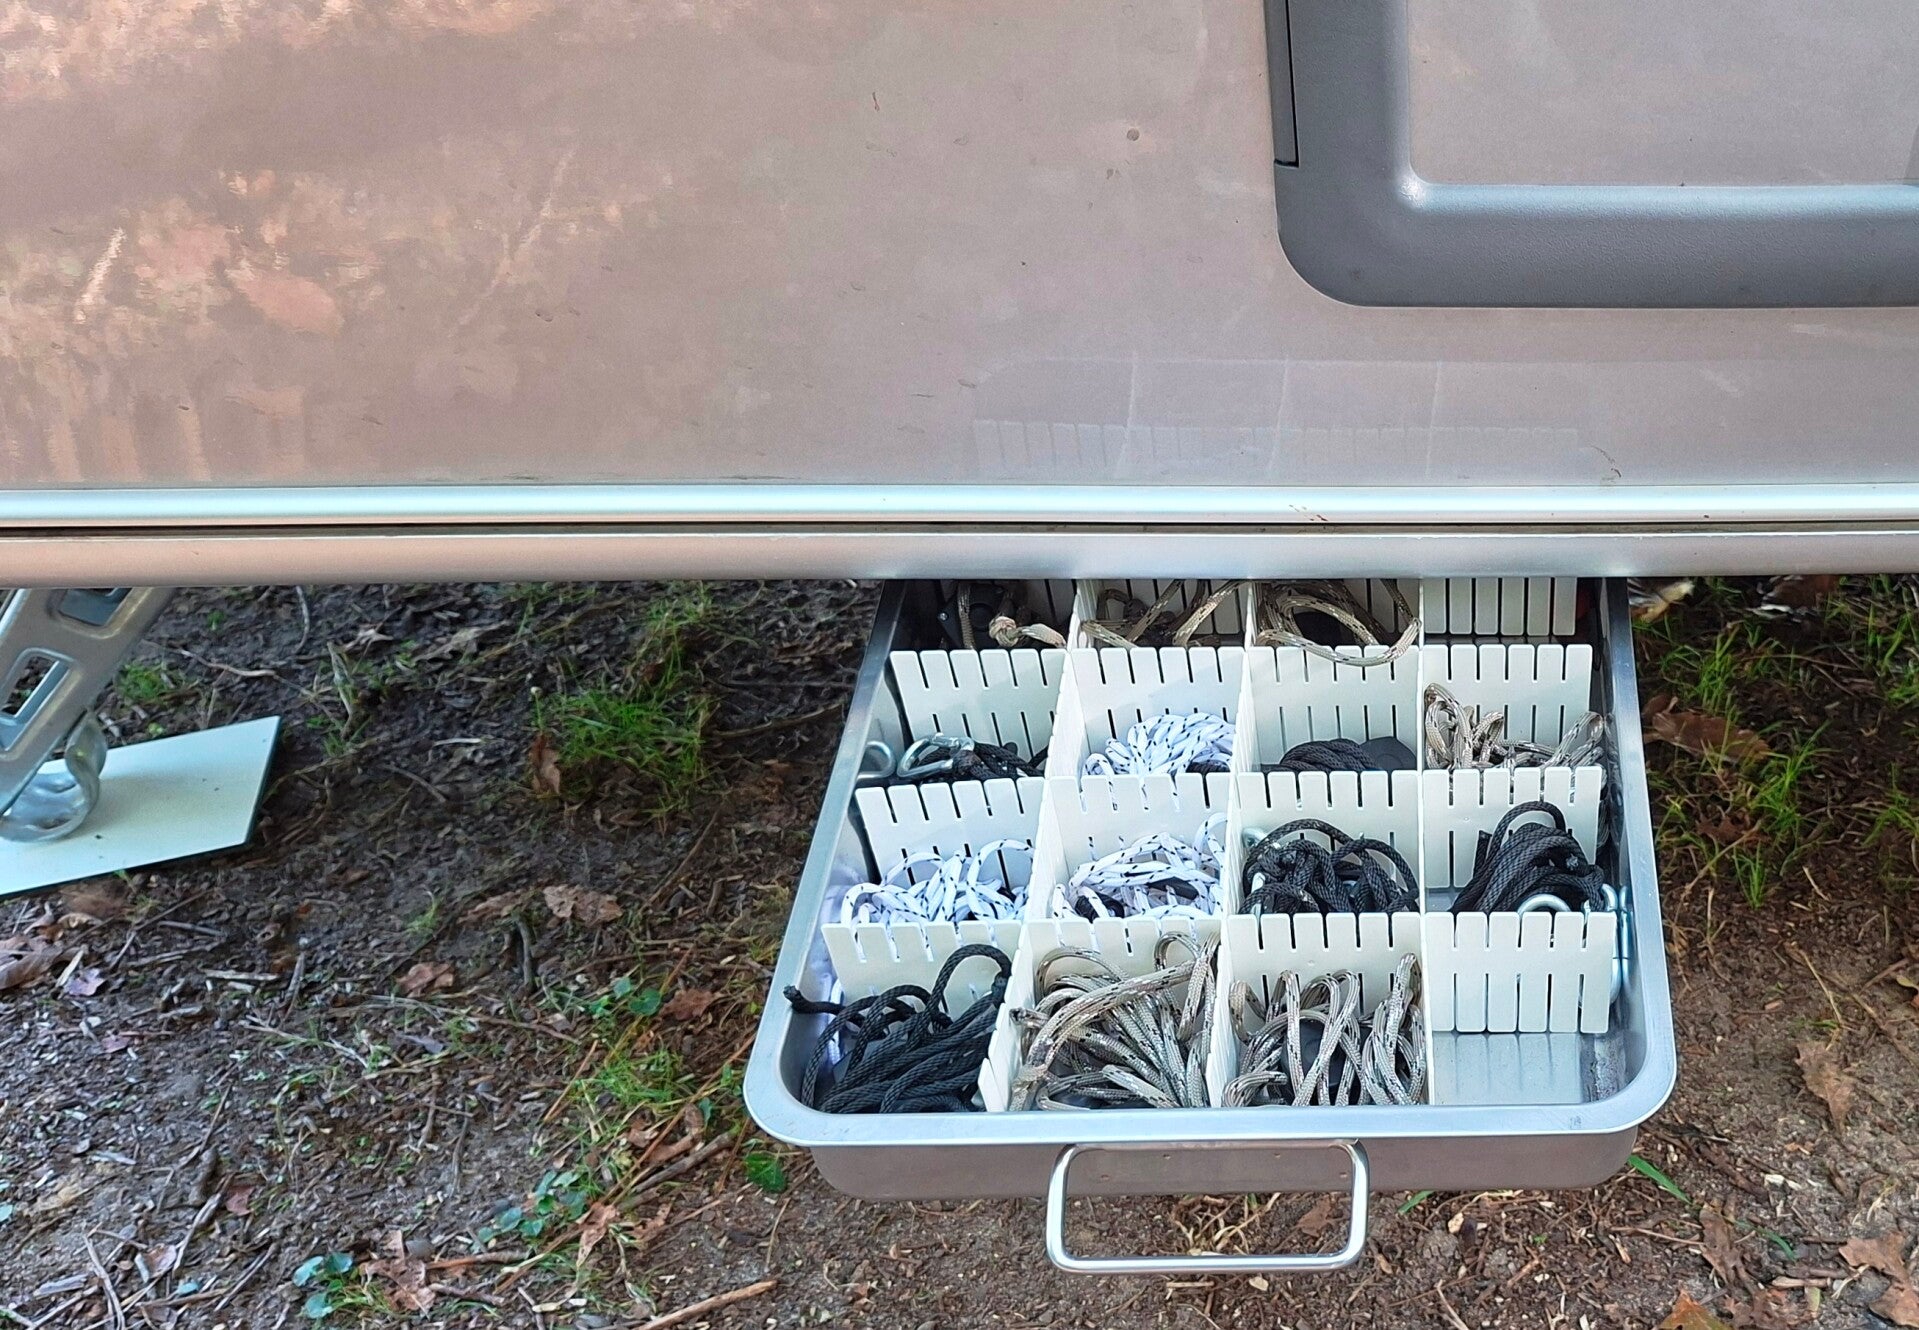
With dividers, guy lines won’t get tangled.

The stainless steel drawer slides into aluminum profiles, which are in turn attached to a hinged assembly. On the left how these profiles are secured. The assembly is shown upside down here; the stainless steel hinge at the rear is not visible. The IKEA oven dish fits perfectly into this setup. The small bracket (photo below) ensures that the assembly can swing open to a point just below the edge of the caravan, allowing the drawer to be removed. The stainless steel piano hinge will be mounted underneath the caravan, along with the bracket and the black L-shaped profile that will be positioned at the front.

In the photos below, the drawer within its sliding mechanism is shown on the left, with the profile featuring two spring-loaded latches in front of it. On the right, an impression of how the entire assembly is mounted underneath the caravan, secured by the spring-loaded latches.


More to follow !!
Vragen en reacties:
Draakje: Komt er onderweg niet veel water in die bakken als het regent en het wegdek nat is? Antwoord: Dat moeten we nog ervaren. Daarom zijn de bakken voorzien van een strook foam (soort tochtstrip) waarmee ze strak tegen de bodem komen. De kleine bakken zijn uitneembaar dus makkelijk droog te maken. De grote stokkenbak is voorzien van afwateringsgaten.
RDNZL_123: Waarom heeft die stokkenbak in het midden een afsluiting met een verende schuif en verder vier klemsluitingen? Antwoord: Het hadden ook vijf klemsluitingen kunnen zijn. Maar... Bedieningsgemak: op deze manier kun je eerst alle klemsluitingen openen en pas als laatste de verende grendel opzij doen. Dan komt de bak mooi recht naar beneden.
Mickey: Mooi die bakken, maar er moeten veel gaten worden geboord in de bodem. Moet de caravan daarvoor op een werkbrug of ga je er onder liggen? Antwoord: We hadden van karton mallen gemaakt met alle boorgaten erop getekend. Die mallen plakten we met ducttape tijdelijk onder de bodem. Geen werkbrug nodig.

Eribaantje123: Maar zijn bouten of schroeven die aan de bovenkant zichtbaar zijn niet heel lelijk en beschadigen ze niet de bagage onder de bankjes? Antwoord: volgt zodra een foto beschikbaar is.
Maak jouw eigen website met JouwWeb